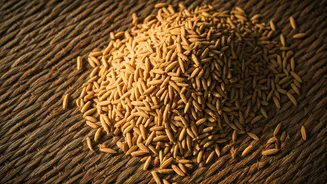


Gather Your Simple Ingredients
The beauty of this recipe lies in its simplicity. You’re taking a humble leftover and elevating it with just a few pantry staples. Before you begin, gather everything you need. For a substantial batch, you’ll want about 2 cups of cooked leftover rice
(any plain white rice works well, from basmati to sona masuri). You will also need water to help create a smooth batter, salt to taste, and your choice of seasonings. Cumin seeds (jeera) and crushed green chillies are classic additions, but feel free to get creative with chilli flakes, ajwain (carom seeds), or even finely chopped coriander. You will also need a bit of oil for greasing and, of course, oil for deep-frying later on. Having everything ready makes the process flow smoothly from one step to the next.
Creating the Perfect Batter
The key to light, crispy fryums is a perfectly smooth batter. Take your leftover rice and place it in a powerful blender or mixer grinder. Add about half a cup of water to start. Your goal is to create a fine, flowing paste with no grainy texture left. You may need to add more water, a tablespoon at a time, to get the right consistency. The ideal batter should be like a thick dosa or pancake batter—pourable but not watery. If it’s too thick, the fryums will be dense; if it’s too thin, they won’t hold their shape. Once you have the perfect texture, transfer the batter to a bowl. Now is the time to stir in your salt and seasonings. Mix well to ensure the flavour is evenly distributed throughout the batter.
The Crucial Cooking Step
This step transforms the raw batter into a stable, spreadable mixture. Pour the rice batter into a heavy-bottomed pan or kadai. Turn the heat to low-medium and begin stirring continuously with a spatula. Do not walk away from the stove, as the mixture can stick and burn easily. As it heats up, the batter will begin to thicken. Keep stirring, making sure to scrape the bottom and sides of the pan. After 8-10 minutes of constant stirring, you will notice a change in texture and appearance. The opaque white batter will become glossy, translucent, and start to pull away from the sides of the pan, forming a single mass. This is the sign that it’s perfectly cooked. Remove it from the heat and let it cool down slightly, just enough so you can handle it.
Shaping and Sun-Drying
Now for the traditional part: shaping and drying. Take a large plastic sheet, a tray, or a plate and grease it lightly with a bit of oil to prevent sticking. You can shape the fryums in a few ways. For the classic round ‘vadam’ shape, simply drop small spoonfuls of the cooked mixture onto the sheet, leaving space between each one. Alternatively, you can fill the mixture into a piping bag or a thick Ziploc bag with the corner snipped off and pipe out thin lines, squiggles, or spirals. Once shaped, the fryums need to dry completely. The traditional method is to sun-dry them for 2-3 days, or until they are bone-dry and brittle, peeling away from the plastic sheet easily. If you don't have access to direct sunlight, you can also dry them indoors in a well-ventilated area, though this may take longer. Make sure they are 100% dry before storing.
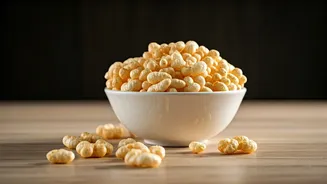
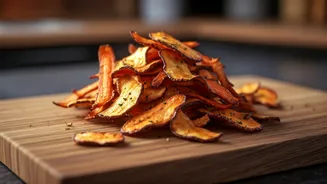
Frying to Crispy Perfection
This is the moment of magic. Once your fryums are completely dried, they are ready to be fried into a delicious snack. Heat a clean, neutral oil (like sunflower or groundnut oil) in a kadai over medium-high heat. To check if the oil is ready, drop a tiny piece of a fryum into it; if it sizzles and puffs up to the surface immediately, the oil is at the perfect temperature. Gently drop a few dried fryums into the hot oil. Don't overcrowd the pan. Within seconds, you will see them expand, curl, and transform into a crispy, white, and airy snack. Use a slotted spoon to flip them once and remove them quickly, as they cook very fast. Drain them on a paper towel to absorb any excess oil. For a healthier alternative, you can also try air-frying them at 180°C for 3-4 minutes until they puff up.
Storing Your Homemade Snack
One of the best things about these homemade fryums is their long shelf life. The key is ensuring they are completely moisture-free before storage. Once you have sun-dried or oven-dried your batch to brittle perfection, let them cool down to room temperature. Then, transfer the uncooked, dried fryums into an airtight container. Stored this way in a cool, dry place away from sunlight, they can last for over a year. This means you can make a large batch when you have plenty of leftover rice and have a ready-to-fry snack on hand for months. It’s the perfect way to be prepared for unexpected guests, a rainy day chai-time craving, or just a fun, crunchy addition to your daily meals.