

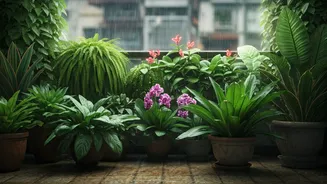


The Joy of a Windowsill Harvest
Urban gardening is blossoming across Indian cities, as people in apartments and flats find clever ways to grow their own food. [2, 4] This isn't just about saving a trip to the market; it's about connecting with nature and enjoying the unparalleled taste
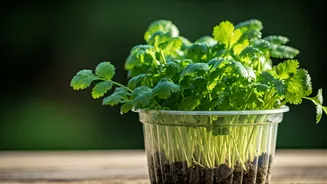
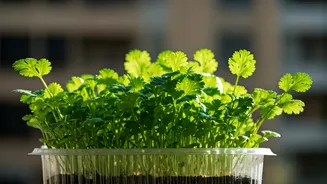
of freshly picked herbs. [14, 22] Coriander, or dhania, is a perfect starting point for any beginner. It’s one of the most used herbs in Indian cooking, grows quickly, and doesn't require a large garden. [9, 10] Growing it at home means you have access to clean, pesticide-free leaves whenever you need them, adding a burst of flavour and nutrition to your dals, curries, and chutneys. [22] The satisfaction of snipping leaves from a plant you grew yourself is a simple pleasure that enhances every meal.
Getting Started: What You Will Need
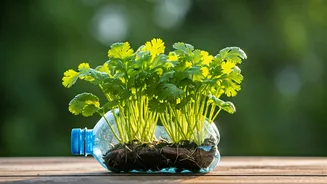
Creating your mini coriander garden is surprisingly simple and affordable. You don’t need fancy equipment, just a few basic items. First, you'll need a container. This is where you can get creative and sustainable by reusing plastic bottles, tubs, or any other plastic container from your home. [8, 11] Next, you'll need good quality coriander seeds; you can even try using the whole seeds from your kitchen spice box. The growing medium is also crucial. A well-draining soil mix is essential. [9] A simple combination of garden soil, compost or vermicompost, and cocopeat in equal parts works wonders. [30] This mix ensures the soil is light, nutritious, and retains the right amount of moisture. Finally, you’ll need a tool to poke drainage holes in your plastic container.
Prepping Your Plastic Planter
Almost any plastic container can be turned into a planter. Two-litre soft drink bottles, milk jugs, or take-away containers are all great options. [11] The most critical step is ensuring proper drainage. Coriander plants hate waterlogged soil, which can lead to root rot. [5, 20] Use a nail, screwdriver, or a heated metal rod to poke several small holes in the bottom of your container. [21] This allows excess water to escape, keeping the roots healthy. Once the holes are made, wash the container thoroughly to remove any residue. If you're using a transparent bottle, you might consider painting the outside or wrapping it in paper to protect the roots from direct, harsh sunlight, which can cause the soil to heat up excessively. [5]
Sowing Seeds for Success
Before sowing, it’s a good practice to gently crush the whole coriander seeds. Each round 'seed' is actually a fruit containing two seeds, and splitting them can improve germination rates. [9] Fill your prepared plastic container with your soil mixture, leaving about an inch of space at the top. Water the soil until it is evenly moist but not soaking wet. [23] Now, scatter the crushed seeds evenly across the surface. Don’t overcrowd them. Cover the seeds with a thin layer of the same soil mix, about a quarter-inch deep. [9] Gently pat the surface and sprinkle a little more water. Place your container in a spot that receives adequate sunlight.
Sunlight, Water, and Ongoing Care
Coriander thrives in cool to moderate weather and needs about four to six hours of sunlight per day. [9] In hotter climates, gentle morning sun is ideal, as the harsh afternoon sun can cause the plant to 'bolt'—flower prematurely and stop producing leaves. [18, 19] Watering is key. Keep the soil consistently moist, but avoid making it soggy. A good rule of thumb is to water when the top inch of soil feels dry to the touch. [23] Since plastic pots retain moisture longer than terracotta ones, be extra careful not to overwater. [5, 20] As your plants grow, you can feed them every few weeks with a light organic fertilizer, like a diluted compost tea or fish wash water, to encourage lush, green growth. [30]
Harvesting for a Continuous Supply
In about 40 to 45 days, your coriander plants should be ready for their first harvest. [10] Once the plants are about six inches tall with plenty of leaves, you can start snipping. The best way to harvest is the 'cut-and-come-again' method. Use scissors to cut the outer, larger leaves, leaving the inner, smaller leaves to continue growing. [9] This encourages the plant to produce more foliage, giving you a continuous supply for several weeks from a single sowing. [15] Avoid pulling the entire plant out by the root. Regular harvesting not only gives you fresh herbs for your kitchen but also promotes healthier, bushier growth.