





Step 1: Designate a Landing Zone
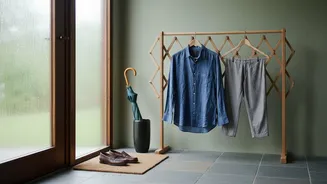
Every item that enters your home needs a designated first stop. This 'landing zone' prevents things from scattering across the kitchen counter or dining table. This should be a single, defined area near the entrance you use most often, like a small console
table, a specific corner of a counter, or even a designated bin. The goal is to contain the influx. When you walk in with mail, packages, or shopping, everything goes directly to the landing zone, and nowhere else. This simple habit stops clutter before it has a chance to spread throughout your home, creating a bottleneck that is easy to manage.
Step 2: Triage and Sort Immediately
A landing zone is not a permanent home. The key to making it work is to sort its contents regularly—ideally, daily. Most clutter is simply a result of delayed decisions. Approach the landing zone with a clear purpose: sort everything into categories. Common ones include 'keep', 'trash/recycle', and 'action required'. Junk mail goes straight into the recycling bin. Bills or forms that need attention go into an 'action' folder. New purchases are unboxed, and the items are put away in their proper homes immediately. This quick, decisive sorting process takes only a few minutes but prevents the landing zone from becoming another overwhelming pile.
Step 3: Adopt the 'One In, One Out' Rule
To maintain a state of equilibrium, the 'one in, one out' rule is a game-changer. The principle is simple: for every new item you bring into your home, a similar item must leave. If you buy a new sweater, an old one must be designated for donation. If a new mug enters the kitchen, another one is removed from the cupboard. This rule encourages more mindful purchasing, as it forces you to consider what you're willing to part with before you buy. It keeps the total volume of your possessions stable, preventing the slow creep of clutter that happens when things only ever accumulate.
Step 4: Create a Dedicated 'Outbox'
Items destined to leave your home need a place to live while they await their departure. A designated 'outbox'—a sturdy bag, bin, or box—serves as a holding area for donations, items to be returned to a store, or things you're giving to friends. Place this outbox in a convenient but out-of-the-way spot, like a closet near the door, in the mudroom, or in the garage. When you identify an old sweater to go out (thanks to the 'one in, one out' rule), it goes directly into the donation station. This prevents 'to-donate' piles from becoming permanent fixtures in your living space.
Step 5: Schedule the Final Disposal
The final, and most crucial, step is to ensure the outbox is emptied regularly. An outbox that never leaves the house is just another form of clutter. Set a recurring reminder on your calendar—once a week or once a month—to drop off donations. For larger items like old furniture or appliances that don't fit in a box, schedule a bulk pickup service or find a local drop-off center. Many municipalities and private companies offer convenient collection services, sometimes for free. Making the disposal of unwanted items a scheduled, routine task ensures the arrival-to-disposal cycle is complete, keeping your home consistently clearer and more organised.