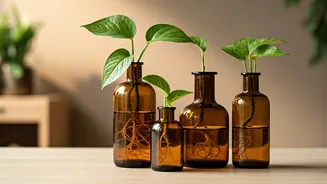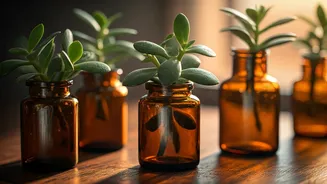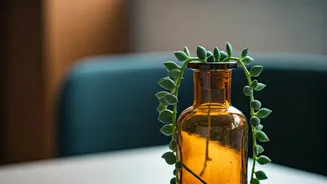


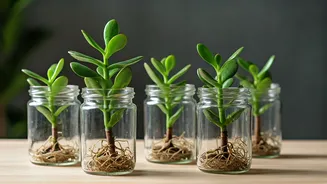
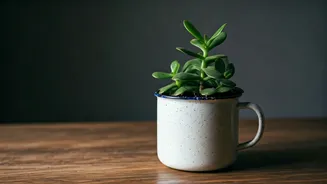


Why Choose a Tinted Bottle?
While any glass jar can host a money vine cutting, tinted bottles offer both aesthetic and practical advantages. The coloured glass—be it amber, green, or blue—lends a rustic, apothecary vibe that clear glass can't match. More importantly, the tint serves
a scientific purpose. It filters sunlight, significantly slowing the growth of algae in the water. Algae competes with your cutting for nutrients and can create a murky, unappealing look. By blocking excess light, a tinted bottle keeps the water cleaner for longer and encourages the cutting to focus its energy on developing strong, healthy roots rather than competing with unwanted green sludge. This creates a healthier environment for your new plant and means less maintenance for you.
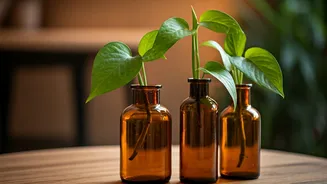
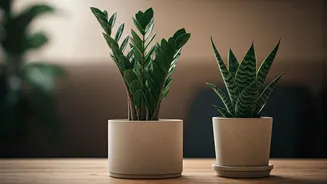
Selecting Your Money Vine Variation
The common money plant, or Pothos (*Epipremnum aureum*), is famously forgiving, but choosing a specific variation can add a unique visual flair to your propagation station. Here are three classic choices that thrive in water: 1. **Golden Pothos:** This is the quintessential money plant with heart-shaped green leaves variegated with creamy yellow streaks. It's incredibly resilient and grows quickly, making it a rewarding choice for beginners. 2. **Marble Queen Pothos:** For a more dramatic look, the Marble Queen features heavily variegated leaves with swathes of creamy white and green. It grows slightly slower than the Golden Pothos due to less chlorophyll, but its stunning foliage is well worth the wait. 3. **Neon Pothos:** As its name suggests, this variety boasts vibrant, chartreuse-green leaves that almost seem to glow. A cutting from a Neon Pothos in a dark amber or blue bottle creates a striking, high-contrast display that is sure to catch the eye.
The Art of the Perfect Cutting
Propagating a money vine successfully begins with taking a healthy cutting. Don’t just snip off a leaf; you need a piece of the stem containing a node. A node is the small bump on the stem where a leaf grows from—this is where new roots will sprout. For the best results, follow these steps: 1. Identify a healthy, mature vine on your parent plant. 2. Using clean, sharp scissors or pruning shears, cut a 4-6 inch section of the vine just below a node. 3. Your cutting should have at least two or three leaves at the top and one or two exposed nodes at the bottom. 4. Carefully remove the leaf closest to the cut end. This prevents the leaf from rotting in the water and ensures the node is fully submerged and ready to root.
Preparing Your Propagation Station
Once you have your cutting, setting up its new home is simple. First, thoroughly wash your tinted bottle with soap and water to remove any dust or residues that could harm the plant. A bottle brush can be helpful for cleaning inside narrow-necked bottles. Rinse it well. Next, fill the bottle with room-temperature water. Tap water is generally fine, but if your water is heavily chlorinated, let it sit out for 24 hours to allow the chlorine to dissipate. Place your prepared cutting into the bottle, ensuring at least one node is submerged in the water while the leaves remain above the waterline. Find a spot for your bottle that receives bright, indirect light—a north or east-facing window sill is often ideal. Direct, harsh sunlight can scorch the leaves.
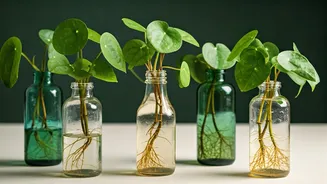
Patience, Water Changes, and Root Growth
Now comes the waiting game. You should start to see small, white roots emerge from the submerged nodes within two to four weeks. During this time, your main job is to keep the environment healthy. Change the water once a week, or whenever it starts to look cloudy. This replenishes oxygen and removes any waste products from the plant. When you change the water, you can also give the inside of the bottle a quick rinse to prevent any film from building up. Once the roots are about an inch or two long, your cutting is technically ready to be potted in soil. However, many people love the look of water propagation so much that they leave the plant in its bottle indefinitely, creating a permanent, low-maintenance hydroponic display.