



Crafting the Perfect Dough
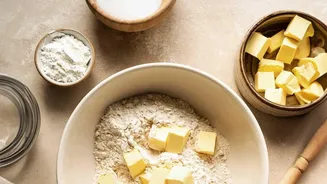
The foundation of any great naan is a soft, pliable dough. The magic lies in a simple combination of all-purpose flour (maida), a leavening agent, and a softening ingredient like yogurt. For a batch of about six naans, you will typically need around two
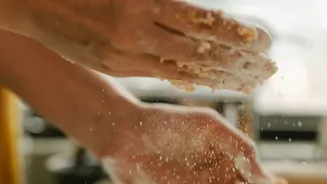
cups of flour. Many recipes skip yeast and instead use a combination of baking powder and baking soda, activated by plain yogurt. This creates a 'quick' dough that doesn't require hours of proofing. Simply combine your dry ingredients—flour, sugar, salt, baking powder, and soda—then mix in yogurt and a little oil. Gradually add lukewarm water or milk and knead for about 10 minutes until the dough is smooth and elastic, but still slightly sticky. Cover the dough with a damp cloth and let it rest in a warm spot for at least one to two hours. This resting period is crucial as it relaxes the gluten, making the dough easier to roll and ensuring the final naan is soft, not chewy.
The All-Important Garlic Topping
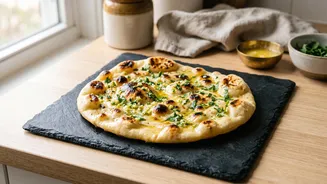
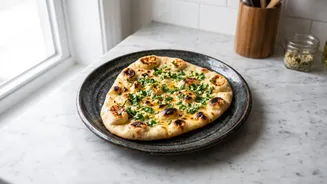
What truly elevates this bread is the generous topping of garlic and herbs. While the dough rests, you can prepare this flavour-packed mixture. Finely chop several cloves of garlic—the more, the better, depending on your preference. Combine the minced garlic with fresh, chopped coriander leaves in a small bowl. Some recipes also suggest adding nigella seeds (kalonji) for an extra layer of texture and subtle onion-like flavour. For the ultimate restaurant-style finish, this topping is often pressed directly into the dough before cooking. After rolling out a piece of dough, sprinkle the garlic and coriander mixture over the surface and gently press it in with your rolling pin to ensure it sticks during the cooking process. Finally, prepare some melted butter or ghee to brush over the hot, finished naans, which will make them glisten and add a final layer of richness.
The Tawa Technique: Mimicking a Tandoor
This is where the stovetop magic happens. The key is to use a heavy-bottomed iron tawa or a cast-iron skillet; non-stick pans will not work for this technique because the naan needs to adhere to the surface. Heat your tawa over a medium-high flame until it's very hot. Roll a ball of dough into the classic teardrop or oval shape, keeping it relatively thin but not paper-thin. Sprinkle your garlic topping on one side and press it in. Now, flip the naan over and brush the plain side generously with water. This wet surface is what will make the naan stick to the hot tawa. Carefully place the naan, water-side down, onto the hot tawa and press it lightly. You will see bubbles start to form on the surface within a minute or two.
Getting the Perfect Char
Once bubbles have appeared all over the top surface of the naan, it's time for the final, most crucial step. Firmly holding the handle of the tawa, flip the entire pan upside down so the top of the naan is directly exposed to the open flame of your gas stove. Move the tawa around continuously to cook the surface evenly and create those signature charred, golden-brown spots. This should only take about 30 seconds to a minute. This direct-heat method mimics the intense, dry heat of a tandoor, cooking the naan through while giving it a slightly smoky flavour. Once cooked, use a pair of tongs to carefully pry the naan off the tawa. Immediately brush the hot surface with your prepared melted butter. This not only adds flavour but also helps keep the bread soft.