






Transform a blank wall into a bespoke art installation with the timeless craft of origami. This guide will walk you through creating a stunning visual impact using nothing more than paper, patience, and the beautiful geometry of repeated shapes.
Choosing Your Canvas and Colours
Before
you make a single fold, the first step is planning. Consider the wall you want to decorate. Is it a large, empty space that can handle a bold, expansive design, or a small nook that needs a delicate touch? The scale of your project will determine how many origami pieces you need and what size your paper should be. Standard 15x15 cm origami paper, often called 'kami', is a fantastic starting point for beginners. It's thin, easy to fold, and comes in a vast array of colours. For more durable, textured pieces, consider 'Tant' paper, which is slightly heavier and holds creases exceptionally well, making it ideal for geometric and modular designs. Think about your colour palette. You could create a gradient effect with different shades of one colour, a vibrant rainbow, or a sophisticated pattern with neutral tones and metallics.
Mastering a Simple, Repeated Shape
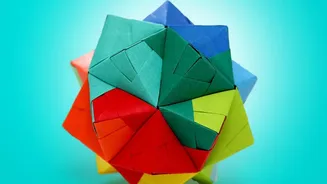
The key to a powerful origami wall display is repetition. Instead of overwhelming yourself with complex models, choose one or two simple shapes and master them. Modular origami, where you connect multiple identical units, is perfect for this. A fantastic beginner-friendly unit is the Sonobe module, a versatile piece that can be interlocked to create everything from cubes to intricate polyhedra. Another popular option is a simple pyramid, which can be made from three interlocking paper components. Basic shapes like diamonds, triangles, or simple folded squares are also highly effective. The goal is consistency. Fold all your pieces on a hard surface to ensure your creases are crisp and sharp. The meditative process of folding dozens of identical units is part of the charm, so put on some music and enjoy the rhythm of creation.
Designing Your Pattern
With a collection of folded units, you can now become the designer. Lay your pieces on the floor or a large table to experiment with patterns before committing to the wall. You could arrange them in a classic geometric tessellation, where shapes fit together in a repeating pattern without gaps. Think of it like tiling, but with paper. You could also create a more organic, flowing design, a chevron pattern, or a radial burst from a central point. Consider the negative space between the pieces as part of the design itself. A helpful tip is to take a photo of your preferred arrangement with your phone. This allows you to reference it easily during the mounting process and ensures the final result matches your vision.
Mounting Your Masterpiece
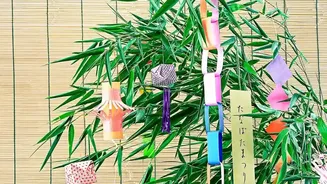
How you affix your art to the wall depends on your pieces and your living situation. For lightweight units, small dots of white PVA glue or a reliable glue stick applied to a mounting board or heavy cardstock is a secure method. You can arrange and glue the pieces to the board first, and then hang the entire board. This makes the artwork portable and is a great option if you can't apply adhesive directly to your wall. For a more direct approach, removable adhesives like wall putty or double-sided mounting strips are excellent choices. They provide a strong hold without damaging paint, which is ideal for renters. For a different kind of display, you can thread your origami pieces, like classic paper cranes, onto a string and hang them in cascading lines from a dowel or stick. Test your chosen adhesive on a discreet spot first to ensure it works well with your wall surface.