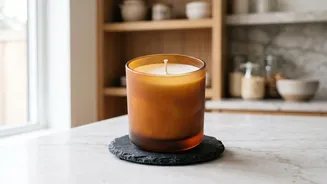








You’ve melted the wax, blended the perfect scent, and poured with a steady hand. But the final, crucial step in candlemaking is often the most overlooked: the cooling process. This is where patience truly pays off.
The Science of a Slow Cooldown
Why is cooling so critical? It all comes
down to chemistry and physics. As wax transforms from a liquid to a solid, it shrinks and forms a crystal structure. If this process happens too quickly, the exterior of the candle can harden while the inside is still liquid. As the inner wax finally cools and contracts, it pulls on the solidified surface, causing imperfections. A slow, even cooling process allows the wax to shrink uniformly, creating a smooth top, strong adhesion to the container, and a stable structure for a clean burn later on. Rushing this stage is a recipe for disappointment, often leading to common flaws that can ruin an otherwise perfect candle.
Creating the Ideal Cooling Environment
Your environment plays the starring role in how well a candle sets. The ideal ambient temperature for cooling most container candles is a stable room temperature, generally between 18°C and 24°C. More important than a specific number is consistency. Avoid dramatic temperature drops, drafts from open windows, air conditioning vents, or fans. Placing freshly poured candles on a cold surface like a granite countertop can also cause the bottom to cool too quickly. To promote even airflow, set your candles on a cooling rack or a wooden board, spaced at least a few inches apart. This prevents them from sharing heat and ensures air can circulate all around the vessel, leading to a more uniform result.
Common Problems from Improper Cooling
Many frustrating candle flaws can be traced back to a rushed or uneven cooling period. Sinkholes are depressions or cavities that form near the wick as the wax contracts unevenly. Cracks, which can appear as lines across the surface, are a classic sign of the wax cooling too rapidly. 'Wet spots' are patches where the wax has pulled away from the glass, which happens when the glass and wax cool at different rates, affecting adhesion. Finally, 'frosting', a white crystalline pattern common in natural waxes like soy, can be made worse by sudden temperature changes during setting. While some of these issues are cosmetic, others like deep sinkholes can affect the candle's burn performance.
Tips for a Flawless Finish
To set yourself up for success, try pre-heating your containers slightly before pouring. A quick warm-up with a heat gun or placing them in a warm oven removes the chill and reduces the temperature shock when the hot wax is added, promoting better glass adhesion. Pouring your wax at a lower temperature can also help, as there is less overall shrinkage that needs to occur. If you're in a particularly cold room, you can even place a cardboard box over the cooling candles to create a more insulated, stable environment that slows the cooling process. Whatever you do, resist the temptation to put your candles in the fridge or freezer to speed things up; this is a guaranteed way to cause cracks and other issues.
Cooling vs. Curing: The Final Wait
Once your candle is solid and cool to the touch—a process that can take up to 24 hours—it's not quite ready to light. The next phase is 'curing'. Cooling is about the wax solidifying, while curing is about the fragrance oil properly binding and dispersing throughout the wax's newly formed crystal structure. This process is what creates a strong and consistent scent throw when you finally burn the candle. Most waxes, especially natural ones like soy, benefit from a curing period of one to two weeks in a cool, dark place. Burning a candle too early, before it has fully cured, can result in a weaker fragrance. So after your careful cooling, let patience be your guide one last time.