
Gather Your Materials and Tools
The beauty of this project lies in its resourcefulness. You’re giving new life to items that might otherwise be discarded. Before you begin, gather everything you'll need. This preparation makes the creative process smooth and enjoyable. For the lamp
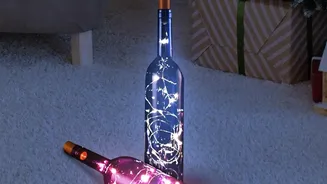
base, you'll need a glass bottle of your choice—wine, spirit, or even a vintage water jug will work beautifully. You'll also require a bottle lamp kit, which can be purchased online or at hardware stores. These kits typically include a socket, cord, and plug. For an even simpler approach, some kits come as pre-wired adapters that fit into the bottle's opening without any drilling. For the lampshade, you'll need an old lampshade frame to recover and fabric remnants of your choice. On the tools front, safety is paramount. You will need safety glasses and gloves, especially for handling glass. If your lamp kit requires the cord to run through the bottle, you'll need a variable-speed power drill and a 1/2-inch diamond drill bit specifically designed for glass and tile. A bit of masking tape and a spray bottle of water will be crucial for the drilling process. For the shade, you’ll need sharp fabric scissors and a hot glue gun.
Step 1: Prepare the Bottle with Care
First, ensure your bottle is clean and dry. If it has labels you wish to remove, soaking it in warm, soapy water usually does the trick. Once clean, it’s time to create an exit point for the electrical cord near the base. This is the most technical step, but entirely manageable with the right technique. Put on your safety glasses and gloves. Apply a piece of masking tape to the spot where you plan to drill; this will prevent the drill bit from slipping on the slick glass surface. The key to drilling glass without it cracking is to keep it cool and avoid applying too much pressure. A great method is to place the bottle in a sink or tub and run a slow, steady stream of cool water over the drilling area. Alternatively, you can continuously spray the area with a water bottle. Begin drilling slowly at an angle to create an initial groove, then straighten the drill. Let the weight of the drill do the work; forcing it will likely break the glass. This process can take several minutes, so be patient. Once the hole is drilled, carefully sand the sharp edges with a file or sandpaper to prevent the cord from fraying.
Step 2: Assemble the Lamp Wiring
With the hole safely drilled, you can now wire your lamp. If you are using a standard lamp kit, this involves feeding the electrical cord through the hole you just made and up through the neck of the bottle. Using pliers or a piece of wire can help you grab the cord from the top opening. Once the cord is through, you'll assemble the socket components according to the kit's instructions. This usually involves attaching the two wires to the designated screws on the socket—typically, the ribbed wire connects to the silver (neutral) screw and the smooth wire to the gold (hot) screw. Secure the socket into the bottle's opening using the provided stoppers or adapters. If you are unsure about wiring, it's always best to consult the kit's instructions carefully or choose a pre-assembled cord set for simplicity.
Step 3: Craft Your Fabric Lampshade
Now for the purely creative part. Take your old lampshade frame—you can easily find these at thrift stores. First, remove the old fabric, leaving you with the bare wire structure. Cut your fabric remnants into long strips, about 1.5 to 2 inches wide. The length of the strips should be slightly longer than the height of the lampshade frame. Starting at one of the vertical supports, use a hot glue gun to attach the top of a fabric strip. Pull it taut and glue the bottom end to the bottom ring of the frame. Place your next strip right beside the first, overlapping slightly to create a seamless or pleated look. Continue this process all the way around the frame until it is completely covered. Once the frame is wrapped, trim any excess fabric from the top and bottom for a clean edge. You can finish the look by gluing a final strip of fabric or ribbon along the top and bottom rims to hide the raw edges.
Step 4: Final Assembly and Placement
The final step is to bring all your hard work together. Attach your newly crafted lampshade to the lamp base. Most lamp kits include a harp, which is the metal U-shaped piece that supports the shade. Screw in a lightbulb—an LED bulb is recommended as it produces very little heat, making it a safer choice for enclosed glass projects. Plug in your lamp and enjoy the warm glow of your handmade creation. Place it on a side table, a bookshelf, or a nightstand where it can be both a source of light and a conversation starter. The custom shade and unique bottle base will add a touch of personal style and creativity to any corner of your home, proving that beautiful decor doesn’t have to be bought, it can be born from imagination and a little bit of effort.