


Why Your Cat Needs to Climb
Before you pick up a single tool, it’s important to understand why this project is so beneficial. For cats, vertical space isn't a luxury; it's a psychological necessity. In the wild, their ancestors climbed trees to survey their territory, escape predators,
and feel secure. Indoor cats retain these powerful instincts. A climbing wall, often called a 'cat highway' or 'catio,' provides an outlet for this behaviour. It increases their usable living space, especially in smaller urban apartments. It gives them a safe perch from which to observe the household, a quiet place to nap away from foot traffic, and a fantastic way to exercise, stretch, and maintain muscle tone. For multi-cat households, it can also reduce conflict by providing more high-value territory to share.
Planning Your Feline Freeway
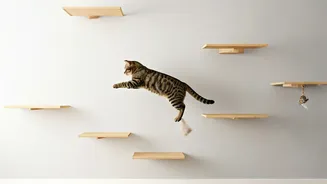
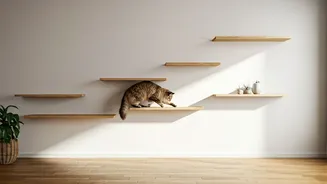
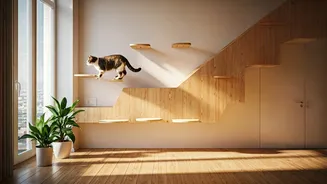
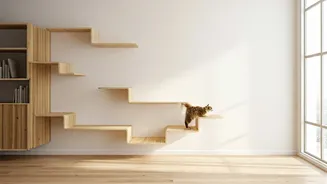
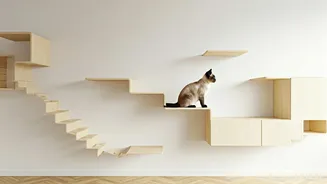
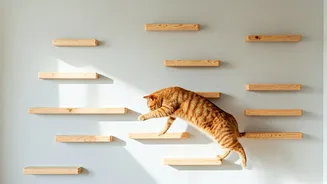
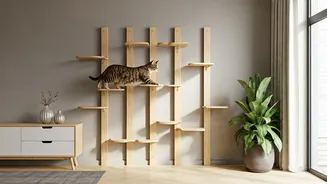
Great design starts with thoughtful planning. First, choose the right wall. A long, empty wall in a living room or a dedicated corner works well. Observe where your cat already likes to hang out. The goal is to create a path that is both fun and functional. Sketch out your design. Think about flow: how will your cat get up and down? A good design includes staggered planks that are easy to jump between. The distance between shelves should be manageable for your cat’s age and agility — typically 30-40 cm vertically and 25-35 cm horizontally is a good starting point. Consider adding a taller perch or a cozy box at the top as a final destination. Also, plan an 'escape route' or multiple ways down so your cat never feels trapped.
Gathering Your Materials and Tools
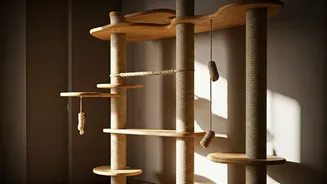
Safety is paramount, so choosing the right materials is crucial. For the planks, opt for solid, untreated wood like pine. Avoid particleboard or MDF, which can't hold as much weight and may contain harmful chemicals. You will need: * **Planks:** Solid wood planks, at least 2.5 cm thick and 20-25 cm deep. * **Brackets:** Strong, L-shaped metal brackets rated to hold significant weight (at least 15 kg per bracket). * **Screws:** Different sizes for securing brackets to the wall studs and for attaching planks to the brackets. * **Wall Anchors:** For use only if you absolutely cannot drill into a stud. * **Carpet or Sisal Rope:** Optional, for adding grip and scratching surfaces. * **Tools:** A power drill, stud finder, measuring tape, pencil, and a level are essential. When you have your planks, sand all edges thoroughly to prevent splinters. You can leave the wood natural or finish it with a pet-safe, non-toxic sealant.
Step 1: Find Studs and Mark Your Wall
This is the most critical step for stability. Use your stud finder to locate the vertical wooden beams inside your wall. These are what you will anchor your brackets to. A floating shelf attached only to drywall is a recipe for disaster. Once you’ve located the studs, use your pencil and measuring tape to mark the exact placement for each bracket according to your sketched design. Use the level to ensure your marks are perfectly horizontal. A slightly crooked shelf might not just look bad; it could be unsafe for your cat.
Step 2: Install the Brackets
With your spots marked, it’s time to install the brackets. Drill pilot holes into the centre of the studs at your marked locations. This makes it easier to drive the screws and prevents the wood from splitting. Securely attach each bracket to the wall using the appropriate screws. Tug firmly on each bracket to ensure it is completely solid and doesn't wiggle. This is your main support system, so take your time and do it right. Two brackets per plank are usually sufficient, but for longer planks, consider adding a third in the middle.
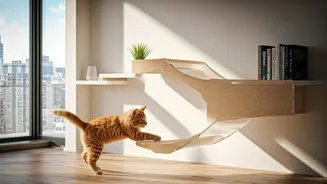
Step 3: Attach the Planks and Finishing Touches
Place your sanded wooden planks on top of the installed brackets. Use the level again to confirm they are flat. Secure the planks to the brackets from underneath using short screws. This prevents the planks from sliding off if your cat makes a particularly energetic jump. Once all planks are installed, you can add finishing touches. Consider wrapping a plank or two tightly with sisal rope to create a built-in scratching surface. You can also attach a small piece of carpet or a soft mat to a perch using non-toxic glue for a comfortable lounging spot. Before letting your cat explore, give the entire structure a final push and pull test to ensure everything is rock-solid.