

Signs It Is Time to Repot
Before you get your hands dirty, it’s crucial to know if your plant actually needs a new pot. Repotting when unnecessary can cause stress. Most healthy houseplants only need a new home every one to three years. Look for these clear signals: roots are
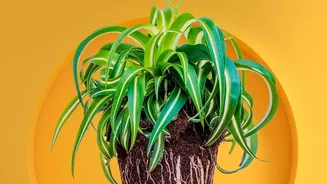
growing out of the drainage holes or are circling densely inside the pot, a condition known as being 'root-bound'. Another sign is that the plant is top-heavy and tips over easily. If you notice that water runs straight through the pot without being absorbed or that the soil dries out extremely quickly, the roots have likely displaced most of the soil, meaning it's time for an upgrade. Stunted growth, like smaller new leaves despite good care, is also a classic indicator.
Gathering Your Supplies
Being prepared makes the process smooth and stress-free for both you and your plant. Before you start, gather everything you will need. This includes a new pot, fresh potting mix, and a pair of scissors or pruning shears. It's also wise to lay down some newspaper or a plastic tarp to make cleanup easier. You might want to have gloves handy, too. Watering your plant a day or two before you plan to repot it is a great tip; slightly moist soil helps the root ball slide out of its current pot more easily. For the new soil, it's vital to use a high-quality potting mix designed for container plants, not garden soil, which is too dense and can introduce pests. Many mixes contain ingredients like peat moss, perlite, and coir that provide the right balance of moisture retention and aeration.
Choosing the Right New Pot
Selecting the right pot is one of the most critical steps. A common mistake is choosing a container that is too large, believing it gives the plant more room to grow. However, an oversized pot holds excess soil that stays wet for too long, which can lead to root rot. The general rule is to select a new pot that is just one to two inches larger in diameter than the old one. This provides enough space for new growth without overwhelming the root system. Also, ensure the new pot has drainage holes. Without them, water will collect at the bottom, suffocating the roots. Materials like terracotta are porous and allow for better airflow, making them great for plants that prefer drier soil, while plastic pots retain moisture for longer.
The Step-by-Step Repotting Process
Once your supplies are ready, it's time to perform the transplant. First, turn the plant’s current pot sideways and gently ease the plant out; avoid pulling it by the stem. If it's stuck, you can tap the bottom of the pot or gently wiggle it. Once free, inspect the root ball. Carefully loosen any tightly wound roots with your fingers. If you see any black, mushy, or dead-looking roots, this is your chance to trim them away with clean shears. Next, place a layer of fresh potting mix in the bottom of the new pot. Position your plant in the center, ensuring it sits at the same depth it did in its old pot. Begin filling in the space around the root ball with more potting mix, gently pressing it down to eliminate large air pockets. Don't pack the soil too tightly, as this can restrict airflow.
Essential Aftercare for a Healthy Transition
Your plant’s journey isn’t over once it's in the new pot. The first few weeks are a crucial adjustment period. After repotting, give the plant a thorough watering to help the new soil settle around the roots. Some mild drooping or 'transplant shock' in the first few days is normal as the roots recover. To help it acclimate, return the plant to the same spot it was in before, so its light conditions remain consistent. One of the most important aftercare tips is to wait before you fertilize. Fresh potting mix contains nutrients, and adding more fertilizer right away can burn the sensitive, newly disturbed roots. Wait at least four to six weeks before resuming your regular feeding schedule.