


The Dairy-Free Froth Challenge
Why is it so hard to get a good foam from non-dairy milk? The answer lies in science. Traditional dairy milk contains the perfect combination of proteins (casein and whey) and fats that trap air bubbles when heated and agitated, creating a stable, velvety
microfoam. Most plant-based milks have a different structure. Their protein content is often lower and their fats are different, making it difficult for them to form and hold those tiny, stable bubbles. This is why you might end up with large, soapy bubbles that disappear in seconds, or worse, no foam at all. Understanding this is the first step to conquering the challenge.
Choosing Your Plant-Based Milk
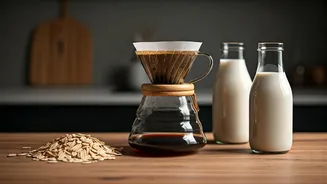
Not all dairy-free milks are created equal when it comes to frothing. Your choice of milk is the single most important factor in your quest for the perfect froth. * **Oat Milk:** The undisputed champion. Oat milk, particularly brands labelled “Barista Edition,” is specifically formulated with a higher fat content and added stabilisers (like rapeseed oil and dipotassium phosphate) to mimic the frothing capabilities of dairy milk. It creates a creamy, dense, and stable foam that’s excellent for lattes and latte art. * **Soy Milk:** A classic and reliable option. Soy milk has a high protein content, which helps it create a decent, dense froth. The flavour is more pronounced than oat milk, but it holds its structure well, especially when steamed. * **Almond Milk:** A popular but tricky choice. Standard almond milk is low in both protein and fat, making it notoriously difficult to froth. It tends to create a light, airy foam that dissipates quickly. For better results, look for barista-specific almond milks, which have added ingredients to improve performance. * **Coconut Milk:** Best for flavour, not foam. The kind in a carton (not the thick canned variety) can create some bubbles, but the foam is typically thin and doesn't last long. Its high fat content can sometimes weigh the bubbles down. It’s great for adding a coconut flavour to your coffee, but not for a structured foam.
The Viral Cold Foam Technique
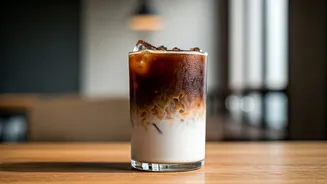
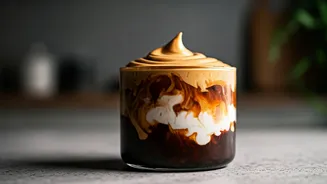
The biggest viral trend isn’t about steaming milk, but about creating a luxurious cold foam to pour over iced coffee. This method is incredibly forgiving and works well with many dairy-free milks. Here’s how you do it: 1. **Choose your milk:** Oat or soy milk works best. 2. **Keep it cold:** Use milk straight from the refrigerator. Cold temperatures help create a more stable foam. 3. **Add a sweetener (optional but recommended):** A dash of maple syrup, vanilla syrup, or powdered sugar doesn't just add flavour; the sugar helps stabilise the foam, making it thicker and longer-lasting. 4. **Froth it up:** Pour a small amount of milk (about 1/4 cup) into a tall glass or jar. Use a handheld milk frother and submerge the whisk just below the surface. Froth for about 20-30 seconds, or until the milk has doubled in volume and formed a thick, pourable foam. 5. **Pour and enjoy:** Slowly pour the creamy cold foam over your favourite iced coffee or cold brew.
Your Frothing Toolkit
You don’t need an expensive espresso machine to get great results. The most popular viral method relies on a simple, affordable tool. * **Handheld Milk Frother:** This small, battery-operated whisk is the hero of the viral coffee trend. It’s perfect for making cold foam and can also be used to aerate hot milk. It’s inexpensive and easy to clean. * **French Press:** A surprisingly effective tool. Pour your cold or warmed milk into the French press (filling it no more than a third of the way). Vigorously pump the plunger up and down for 30-60 seconds until the milk has thickened and doubled in size. * **A Simple Jar with a Lid:** The ultimate low-tech solution. Pour cold milk into a jar, seal it tightly, and shake it as hard as you can for about a minute. This won’t create microfoam, but it will give you a decent frothy texture for your coffee. * **Espresso Machine Steam Wand:** If you have one, this is still the gold standard for hot, steamed milk. The trick is to not overheat the plant-based milk, as it can curdle or develop an off-flavour. Heat it to around 60-65°C for best results.