


Why Bother with Composting?
Composting is nature’s recycling program, and bringing it into your home has immense benefits. Firstly, it significantly reduces the amount of household waste sent to landfills, which in turn cuts down on methane, a potent greenhouse gas. Secondly, it provides
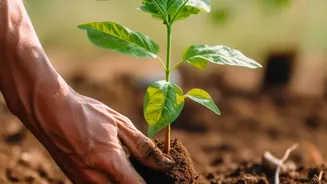
you with a free, high-quality soil amendment. Unlike synthetic fertilisers, compost releases nutrients slowly, improving soil structure, helping it retain moisture, and promoting a healthy ecosystem of beneficial microorganisms. This means healthier plants that are more resilient to pests and diseases, reducing the need for chemical pesticides. In short, it saves money, protects the environment, and gives your plants the best possible foundation to thrive.
What You Can (and Can't) Compost
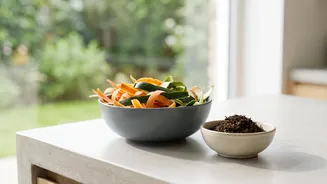
The key to successful, odour-free composting is knowing what to put in your bin. You need a good mix of 'greens' (nitrogen-rich materials) and 'browns' (carbon-rich materials). Vegetable peels and tea leaves from the headline are perfect 'greens'. What to add: - Greens: Vegetable and fruit scraps, tea leaves, coffee grounds, and fresh grass clippings. - Browns: Dried leaves, shredded newspaper or cardboard, sawdust, and small twigs. - Also great: Crushed eggshells add calcium. What to avoid: - Meat, fish, bones, and dairy products. - Oily, greasy, or cooked foods. - Pet waste from cats or dogs, which can contain harmful pathogens. - Diseased plants or weeds that have gone to seed.
A Simple Method for Any Home
You don't need a large garden to start composting. A simple bin on a balcony or under the sink can work perfectly. You can use a dedicated compost bin, a large terracotta pot, or even a sturdy plastic bucket with a lid. The key is to ensure it has some holes for aeration, but not so large that pests can get in. Here’s a basic setup: 1. Start with a 2-3 inch layer of 'browns' at the bottom. This can be dried leaves, cocopeat, or torn-up cardboard. This layer helps with drainage and airflow. 2. Begin adding your kitchen scraps ('greens') like vegetable peels and tea leaves. 3. Each time you add a layer of greens, cover it with a layer of browns. A good rule of thumb is to use two to three parts brown material for every one part green material. This balance is crucial for preventing smells and ensuring the microbes have the right diet to work efficiently.
Maintaining Your Compost Bin
A compost pile is a living ecosystem that needs a little care. The most important factors are moisture and air. Your compost should feel like a wrung-out sponge—moist, but not dripping wet. If it’s too dry, sprinkle some water on it. If it’s too wet and starts to smell, add more dry 'brown' materials like shredded paper or sawdust to soak up the excess moisture. Every few days, it's a good idea to turn or mix the contents of your bin with a small rake or trowel. This process introduces oxygen, which is essential for the aerobic microorganisms that do the hard work of decomposition. Proper aeration prevents the pile from becoming a smelly, anaerobic mess and speeds up the composting process significantly.
Harvesting Your 'Black Gold'
Depending on your method and the conditions, your compost could be ready in as little as one month or it might take several months. You'll know it's ready when it has transformed into a dark, crumbly material that smells earthy and pleasant, like a forest floor. You should no longer be able to identify the original kitchen scraps you put in. To harvest, simply scoop out the finished compost from the bottom of your bin, leaving the top layers to continue decomposing. Sift it to remove any larger, unfinished pieces, which you can throw back into the bin. This finished compost is incredibly versatile. You can mix it into the soil of your potted plants, use it as a top dressing for your vegetable beds, or even brew it into a 'compost tea' to use as a liquid fertiliser.