


The Magic of No-Bake
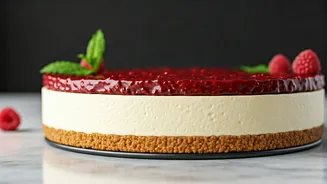
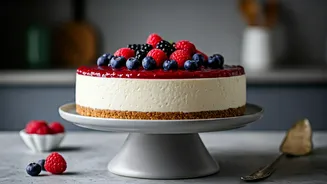
In a country where the weather often makes us think twice about firing up the oven, the no-bake dessert is a true hero. A no-bake cheesecake, in particular, feels like a minor miracle. It delivers all the creamy, tangy luxury of its baked counterpart
without any of the drama—no water baths, no worrying about cracks, and no long cooling periods. It’s an elegant, impressive dessert that comes together in your refrigerator, making it the perfect centrepiece for a dinner party, a birthday celebration, or simply a weekend treat you absolutely deserve. It’s simplicity and sophistication, all served chilled on a plate.
The Anatomy of a Perfect Crust
The foundation of any great cheesecake is its crust, and a no-bake version is no exception. The goal is a base that’s crunchy, buttery, and firm enough to hold its shape without being rock-hard. Digestive biscuits are the classic choice, offering a slightly wheaty, not-too-sweet flavour that complements the tangy filling. Crush them to a fine, sandy texture—any large chunks will create weak spots. The secret ingredient is melted butter, which acts as the glue. The ratio is key: too little butter and the crust will crumble; too much and it becomes greasy. Once mixed, press the crumbs firmly and evenly into your springform pan. Use the flat bottom of a glass or a small katori to get a compact, level base before chilling it. This crucial step ensures your slices come out clean every time.
Crafting the Dreamiest Filling
The heart of the cheesecake is its filling, and the texture is non-negotiable. It must be creamy, smooth, and light, yet firm enough to slice cleanly. This recipe relies on a trio of star ingredients. First, full-fat cream cheese is essential for richness and structure; don't be tempted to use the low-fat version. Second, sweetened condensed milk provides sweetness and a velvety texture, eliminating the need for granulated sugar which can sometimes feel gritty. Finally, a splash of fresh lemon juice not only adds a beautiful, subtle tang that cuts through the richness but also reacts with the dairy to help the cheesecake set firmly. Whipped cream is folded in at the end to lighten the mixture, giving it an airy, mousse-like quality that is truly irresistible.
The Foolproof Recipe
Here are the components for your masterpiece. **For the Crust:** - 200g digestive biscuits (about 1.5 packets) - 100g unsalted butter, melted **For the Filling:** - 400g full-fat cream cheese (like Amul or Philadelphia), at room temperature - 1 can (400g) sweetened condensed milk - 1/4 cup fresh lemon juice - 1 teaspoon vanilla extract - 250ml heavy whipping cream, chilled **Instructions:** 1. **Make the crust:** Crush the biscuits into fine crumbs. Mix with melted butter until it resembles wet sand. Press firmly into the base of a 9-inch springform pan. Chill in the freezer for 15 minutes while you make the filling. 2. **Start the filling:** In a large bowl, beat the room-temperature cream cheese with an electric mixer until completely smooth and free of lumps. This is a crucial step! 3. **Combine:** Pour in the condensed milk and beat until combined. Add the lemon juice and vanilla extract, mixing until just incorporated. 4. **Whip and fold:** In a separate bowl, whip the chilled heavy cream until it holds stiff peaks. Gently fold the whipped cream into the cream cheese mixture in two or three additions, being careful not to deflate the air. 5. **Assemble and chill:** Pour the filling over the chilled crust and smooth the top with a spatula. Cover with plastic wrap and refrigerate for at least 6 hours, or preferably overnight, until firm.
Tips for Guaranteed Success
To ensure your cheesecake is flawless, keep these simple tips in mind. First, use room temperature cream cheese. Cold cream cheese will result in a lumpy filling, no matter how much you beat it. Second, don't overmix after adding the whipped cream; you want to keep the filling as light and airy as possible. Third, be patient with the chilling time. This is where the magic happens. Six hours is the minimum for the cheesecake to set properly and develop its flavour. Finally, to get clean slices, run a sharp knife under hot water and wipe it dry before each cut. It’s a small step that makes for a beautiful presentation.
Make It Your Own
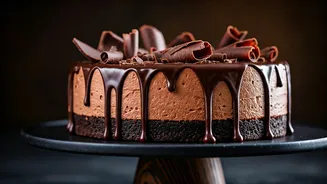
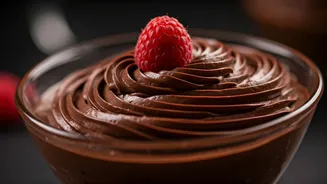
While this classic recipe is divine on its own, it’s also a wonderful canvas for your creativity. For a fruity twist, top the set cheesecake with a layer of mango puree, a fresh berry compote, or passion fruit pulp. Chocolate lovers can create an Oreo biscuit base and drizzle the finished cake with a rich chocolate ganache. For a touch of Indian fusion, consider flavouring the filling with a pinch of cardamom or saffron, or topping it with chopped pistachios and rose petals. The possibilities are endless, allowing you to tailor this simple dessert to any taste or occasion.