



Start With Your Unchangeable Reality
Before you gather a single piece of inspiration, you must first document your starting point. Every room has fixed elements that are either impossible or too costly to change. Take clear photos of your space. Pay close attention to the things that are not
going anywhere: the flooring, the window placements, the radiator in the corner, or the architectural details like cornices or built-in shelving. These are not limitations; they are the foundation of your design. By placing images of these fixed realities on your board first, you ensure that every idea you add later is compatible with the room's true character. This prevents the common mistake of falling in love with a look that simply cannot work in your space.
Document Dimensions and Layout
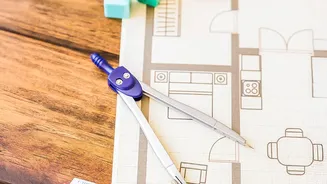
A beautiful sofa that blocks a doorway is not beautiful design. This is why the next step is to ground your moodboard in cold, hard numbers. Measure your room and sketch out a basic floor plan. Note the dimensions of walls, the height of ceilings, and the placement of doors and windows. This sketch becomes a critical part of your moodboard. As you find furniture pieces you love, check their dimensions against your floor plan. This dose of reality helps you filter out items that are out of scale, ensuring your final room feels balanced and functional, not cramped or empty. It transforms your moodboard from a collection of pretty pictures into a genuine planning tool.
Capture the Light
The colour you loved on a paint chip can look completely different on your walls. The reason? Light. The quality, direction, and amount of natural light a room receives throughout the day dramatically affects how colours and textures appear. Your moodboard needs to account for this. Take photos of your room in the morning, at noon, and in the evening to see how the light changes. When considering paint, get actual samples and paint small test patches on your walls. Add photos of these test patches to your moodboard to see how they interact with your other chosen elements under the room's specific lighting conditions. Don't forget to consider artificial light sources as well, as they will define the room's atmosphere after dark.
Integrate Your 'Must-Keep' Items
Few of us start a design project with a completely empty room. There might be an inherited armchair, a piece of art you adore, or a rug you’re not ready to part with. These items must have a place on your moodboard. Take well-lit photos of these pieces and add them to your board. This forces you to design with them, not around them. Treating your existing furniture and decor as key elements ensures the new items you bring in will complement what you already own, creating a cohesive space that feels personal and evolved, rather than a showroom copy. This step is crucial for creating a room that truly reflects your story.
Gather Inspiration, Then Edit Ruthlessly
Now for the fun part: gathering inspiration. Go wild on Pinterest, in magazines, and from fabric samples. Collect images that evoke the feeling you want for the room. However, once you have a collection of ideas, the most important design work begins: editing. Hold each inspirational image up against the reality you've established on your board—the fixed architecture, the layout, the lighting, and your must-keep items. Does that dark, moody colour palette work in your sun-drenched, south-facing living room? Does that minimalist furniture align with your treasured antique collection? Be honest and ruthless. The goal is to curate a selection of images, colours, and products that create a unified story that is both inspiring and, most importantly, achievable.
Add Real Textures and Swatches
A digital-only moodboard can be misleading. A screen cannot replicate the feeling of a linen curtain or the texture of a wooden surface. To make your moodboard truly useful, incorporate physical materials. Order fabric swatches, get paint sample pots, and collect small samples of flooring or tile if applicable. Pinning these real-world items to a physical board (or laying them out together) provides a tactile sense of how the different elements will interact. It helps you understand the sensory experience of the space, ensuring the final room not only looks good but feels right, too. This step bridges the final gap between abstract idea and tangible reality.