


What Exactly Is Tadasana?
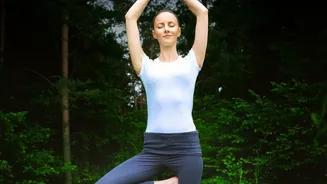
First, let's clear up the names: Tadasana is the Sanskrit term for what is commonly called Mountain Pose. 'Tada' means mountain, and 'asana' means pose. The name perfectly captures the essence of the posture: to stand as steady, strong, and unwavering
as a mountain. It might look like simple standing, but it is an active and conscious pose that serves as the starting point for all other standing postures in yoga, from the Warrior series to Tree Pose. Think of it as the foundational alphabet from which you will learn to write entire sentences with your body. Mastering its principles of alignment and awareness is key to a safe and effective practice.
Why This 'Simple' Pose Matters
Though it appears basic, Tadasana offers profound benefits. Its primary function is to improve posture and body awareness. By consciously aligning your body from the ground up, you retrain your muscles to counter the effects of slouching over desks and phones. This active engagement strengthens the thighs, knees, ankles, and core, creating a stable base for more complex movements. Practising it regularly enhances balance, which is crucial for preventing falls, especially as we age. Mentally, the focus required to hold the pose with intention cultivates mindfulness, reduces stress, and calms the mind, making you feel more grounded and centred.
Step 1: Ground Your Foundation
Proper alignment in Tadasana starts with your feet. Stand with your feet either together with the big toes touching, or hip-width apart for greater stability. Lift and spread your toes to widen your base, then gently lower them back to the mat. The goal is to distribute your weight evenly across the four corners of each foot: the mound of the big toe, the inner heel, the mound of the pinky toe, and the outer heel. Avoid leaning forward onto the balls of your feet or back onto your heels. A gentle rock back and forth and side to side can help you find that perfect centre of balance.
Step 2: Align Your Legs and Pelvis
With your feet grounded, bring your attention to your legs. Engage your thigh muscles (quadriceps) to gently lift your kneecaps, but be careful not to lock your knees—maintain a tiny, almost invisible bend to protect the joints. Imagine your inner thighs are gently spiralling inward. Now, focus on your pelvis. Many people tend to either arch their lower back or tuck their tailbone too far under. Find a neutral position by lengthening your tailbone down toward the floor while gently lifting the pit of your abdomen in and up. This engages your core and brings your spine into its natural, healthy alignment.
Step 3: Lengthen Your Torso and Relax Your Shoulders
From your stable base, grow taller. Lengthen up through your spine as if a string is gently pulling the crown of your head toward the ceiling. As you do this, let your shoulders roll up toward your ears, then back, and finally release them down. This action broadens your collarbones and opens your chest, allowing for deeper breaths. Let your arms hang naturally by your sides. You can keep your palms facing your thighs or turn them to face forward, which further encourages the opening of the chest. The key is to release any tension you might be holding in your shoulders and neck.
Common Misalignments to Avoid
As you practice, watch out for a few common habits. The most frequent is locking the knees, which puts strain on the joints. Another is either excessively arching the lower back or slouching, both of which disrupt spinal alignment. Many people also carry unconscious tension in their shoulders, hunching them up toward their ears. Consciously relax them down and back. Finally, ensure your weight is balanced. It's easy to lean onto one foot or to the inner or outer edges. Always bring your awareness back to the four corners of both feet to stay centred and grounded.