

The Foundation of Crunch: Start Dry
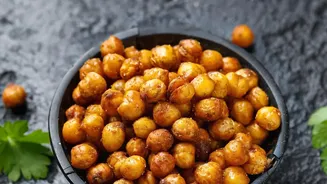
The single most important step to achieving a crunchy roasted chickpea is removing as much moisture as possible before it enters the oven. Moisture is the enemy of crispiness; it creates steam, which results in a soft, chewy bean rather than a crunchy one.
Whether you're using canned chickpeas or those you've cooked from dried, the process is the same. First, drain and rinse them well. Then, spread them on a clean kitchen towel or paper towels and gently pat them dry. You can even roll them around a bit. For best results, let them air dry on the counter for 30 minutes to an hour to allow any remaining surface moisture to evaporate. During this process, don't worry about the thin skins that might flake off; simply discard them.
Mastering the Roasting Process
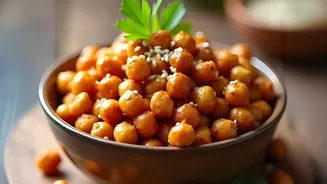
High heat is essential for a good roast. Preheat your oven to a temperature between 400°F and 425°F (200-220°C). Spread the thoroughly dried chickpeas in a single, even layer on a baking sheet. Overcrowding the pan is a common mistake that traps steam and prevents the chickpeas from crisping up, so make sure they have plenty of space. For the initial part of the roast, some experts suggest a 'dry roast' without any oil for about 15-20 minutes to help dry out the exterior even further. After this initial stage, you can drizzle them with a neutral, high-heat oil like avocado or olive oil and toss to coat before returning them to the oven. Roast for a total of 25-35 minutes, shaking the pan every 10-15 minutes, until they are golden brown and feel dry and crispy to the touch. They will continue to crisp up as they cool. An air fryer can also achieve a great crunch in less time.
The Art of Seasoning
While you can add salt with the oil, it is often best to add most of your spices after the chickpeas come out of the oven. Tossing them with seasonings while they are still hot from the pan helps the spices adhere without the risk of burning them during a long roast. Popular savoury combinations include smoked paprika and cumin; garlic powder and oregano; or a simple salt and pepper. For a bit of a kick, try chilli powder, curry powder, or a chipotle blend. You can even go sweet by tossing them in cinnamon and a touch of sugar. Other creative options include everything bagel seasoning, za'atar, or a squeeze of fresh lime juice just before serving.
Beyond a Simple Snack
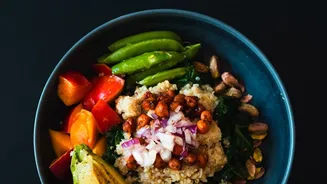
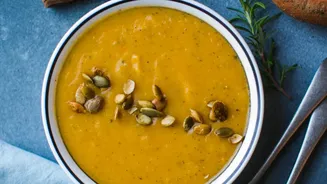
While delicious on their own, crunchy roasted chickpeas add texture and plant-based protein to a huge variety of dishes. They are a classic, healthy alternative to croutons in salads, adding a satisfying crunch to leafy greens or a hearty quinoa bowl. Sprinkle them over soups just before serving to add a textural contrast to a creamy tomato or butternut squash soup. They can be added to pasta dishes, grain bowls, and wraps for an extra layer of flavour and substance. Try them in a deconstructed falafel bowl, tossed into a chickpea curry for a different texture, or used as a garnish on top of hummus platters. Their versatility makes them a pantry staple for quick and interesting meals.
Storing for Lasting Crispiness
Proper storage is crucial to maintaining that hard-earned crunch. The biggest mistake is sealing roasted chickpeas in an airtight container while they are still warm, as this traps steam and makes them soggy. Allow them to cool completely on the baking sheet for at least an hour. For the best results, store them at room temperature in a glass jar or bowl with the lid left slightly ajar, or simply cover the container with a paper towel. This allows for air circulation and prevents moisture buildup. Roasted chickpeas are at their best when eaten within two days. If they do lose some of their crispness, you can often revive them with a quick 5-minute toast in the oven or air fryer.