





Why Indian Atta is Your Secret Weapon
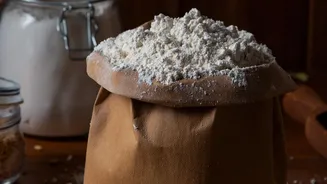
Forget expensive imported bread flours. The humble whole wheat atta in your pantry is one of the best ingredients for starting a sourdough culture. Why? Because whole wheat flour contains the bran and germ of the wheat kernel, which are rich in the natural
wild yeasts and bacteria needed to kickstart fermentation. This means an atta-based starter often becomes active faster and more robustly than one made with refined maida. While bread flour is prized for its high protein content, which creates a strong gluten network in dough, this isn't essential for the starter itself. Atta provides more than enough nutrients to get your wild yeast colony thriving, lending a wonderfully nutty, complex flavour to your future loaves.
Gathering Your Simple Tools
You don't need a professional bakery setup. Most of what you need is already in your kitchen. First, find a clean glass jar of about 500ml capacity; something that used to hold pickles or jam works perfectly. It's important to use glass or ceramic, as plastic or metal can react with the fermenting culture. You will also need a digital kitchen scale for accurate measurements, which are crucial for consistency. Using weight (grams) is far more reliable than volume (cups). Finally, grab your bag of whole wheat atta and some filtered, non-chlorinated water. Tap water that has been boiled and cooled, or standard bottled water, is ideal. A rubber band to mark the starter's height on the jar is also a helpful visual aid.
Days 1-3: Creating Life
This is where the journey begins. On Day 1, place your clean jar on the kitchen scale and measure 50 grams of whole wheat atta and 50 grams of water directly into it. Stir vigorously until no dry flour is left, forming a thick paste. Cover the jar loosely—a cloth secured with a rubber band or the jar's lid placed on top without being screwed tight is perfect to allow airflow. Let it sit in a warm spot in your kitchen for 24 hours. On Day 2, you might see a few bubbles, or nothing at all. Both are normal. Do nothing except wait another 24 hours. On Day 3, it's time for the first feeding. Discard about half of the starter. Then, add 50 grams of fresh atta and 50 grams of water. Mix well, cover, and wait another 24 hours.
Days 4-7: Building Strength
From Day 4 onwards, your starter should begin showing more consistent signs of life, like bubbles and a sour aroma. Now, you need to feed it twice a day, roughly 10-12 hours apart. Each time, you'll repeat the same process: discard all but about 50 grams of your starter, then add 50 grams of atta and 50 grams of water. This is known as a 1:1:1 feeding ratio (starter:flour:water). This regular feeding schedule removes waste products and provides fresh food for the yeast, making the culture stronger. In India's warm climate, fermentation happens fast. You might find your starter doubling in volume just 4-6 hours after a feed, which is a great sign of its growing power.
Is It Ready to Bake?
By around Day 7 to Day 10, your starter should be mature and ready for baking. A healthy, active starter will reliably double or even triple in volume within a few hours of being fed. It will be full of bubbles, both large and small, and have a pleasant, tangy smell—not unpleasantly sour. The ultimate test is the 'float test'. A few hours after feeding, when the starter is at its peak height, drop a small spoonful of it into a glass of water. If it floats, it's full of trapped gas and ready to leaven bread. If it sinks, it needs a few more days of consistent feeding to build more strength.
Maintenance in a Warm Climate
Managing a starter in India requires adapting to heat and humidity. Warm temperatures accelerate fermentation, so your starter will get hungry faster. If you're not baking daily, the refrigerator is your best friend. Keep your mature starter in a sealed jar in the fridge and feed it just once a week to keep it healthy. When you want to bake, take it out, let it come to room temperature, give it one or two feeds 12 hours apart to wake it up fully, and then perform the float test. High humidity can sometimes make a starter too runny; if this happens, you can thicken it by using slightly less water in your feeding ratio.