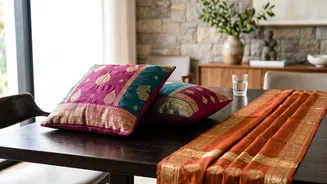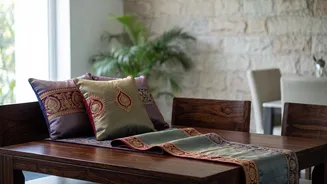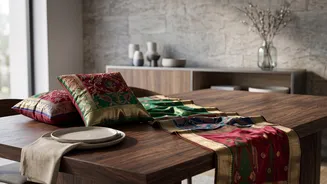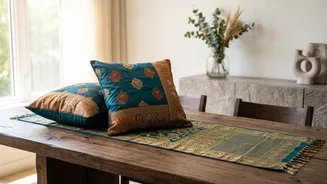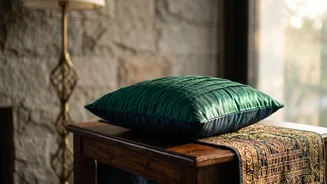





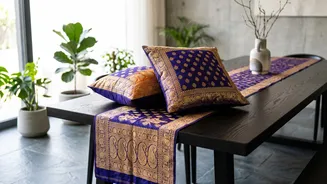

Every old silk saree in your closet holds a story. Instead of letting them gather dust, give them a new life. This festive season, transform those cherished fabrics into beautiful home decor that’s both sustainable and deeply personal.
Why Repurpose Your Silk Sarees?
Upcycling a saree
is more than just a craft project; it’s an act of preserving memories. Those rich colours, intricate zari borders, and soft textures can bring a touch of heritage and elegance to your living space. Creating your own cushion covers and table runners is a sustainable choice that reduces waste and results in one-of-a-kind decor pieces that you won’t find in any store. It’s a wonderful way to blend tradition with modern home styling, especially ahead of festive seasons like Diwali or family celebrations.
Gathering Your Tools and Materials
Before you begin, gather everything you need to make the process smooth and enjoyable. Having your tools ready will help you focus on the creative part. You will need: - An old silk saree (washed and ironed) - Sharp fabric scissors or a rotary cutter. - A sewing machine (or needle and thread for hand-stitching) - Fine pins suitable for silk. - Measuring tape - Tailor’s chalk or a fabric marker - Cushion inserts of your desired size - A complementary fabric for the back of the cushion (optional, but recommended for delicate sarees). - Lining fabric for the table runner (optional, for added durability)
Step-by-Step: Creating a Cushion Cover
Making a simple envelope-style cushion cover is a perfect project for beginners. 1. Measure and Cut: For a standard 16x16 inch cushion, you’ll need one front piece and two back pieces. Cut one square of 17x17 inches from the most decorative part of your saree, like the pallu. For the back, cut two rectangular pieces of 17x12 inches each. The extra inch on all sides is for the seam allowance. 2. Hem the Back Pieces: Take one of the back pieces and fold one of the 17-inch edges over by half an inch, then fold it again and stitch it down to create a clean hem. Repeat for the second back piece. 3. Assemble the Cover: Place the front piece right-side-up. Lay the two hemmed back pieces on top, right-side-down, so that their hemmed edges overlap in the middle. Pin all four sides together. 4. Sew: Stitch around all four edges with a half-inch seam allowance. Reinforce the corners by backstitching. Clip the corners to ensure they are sharp when turned out. 5. Finish: Turn the cover right-side-out through the envelope opening and press gently. Insert your cushion, and you’re done!
Step-by-Step: Crafting a Table Runner
A table runner can instantly elevate your dining space. The beautiful borders of a silk saree are perfect for this. 1. Measure Your Table: Decide on the desired length and width of your runner. A standard runner hangs about 6-12 inches over each end of the table. Add a one-inch seam allowance to your total measurement. 2. Cut the Fabric: Cut a long strip from your saree according to your measurements. Try to centre a beautiful border or pattern. If your saree is lightweight, consider cutting an identical piece from a lining fabric like plain cotton for extra weight and stability. 3. Sew the Runner: If using a lining, place the saree fabric and lining fabric right-sides-together and pin along the edges. Stitch around the perimeter, leaving a small 4-5 inch gap on one side for turning. 4. Finish: Clip the corners, then turn the runner right-side-out through the gap. Gently push out the corners to get a crisp shape. Press the runner flat with an iron, making sure the edges are neat. Topstitch around the entire runner for a professional finish, which will also close the gap you left for turning.
Tips for Sewing with Silk
Silk can be a slippery and delicate fabric to work with, but a few tricks can make it much easier. - Pre-wash Gently: Always pre-wash your saree by hand to prevent shrinking or colour bleeding later on. - Use the Right Needle: Use a new, fine machine needle (size 60/8 or 70/10) to avoid pulling threads or damaging the fabric. - Pin Generously: Use plenty of fine, sharp pins to keep the fabric from shifting while you cut and sew. - Finish Your Seams: Silk frays easily. Finish raw edges with a French seam or a zig-zag stitch to ensure your creations are durable. - Press with Care: Use a low heat setting on your iron and always use a pressing cloth to avoid scorching or water spots on the delicate fabric.