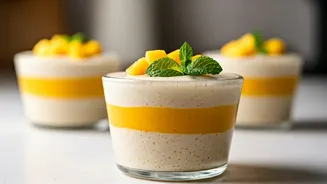

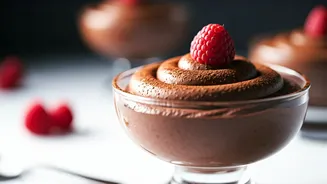
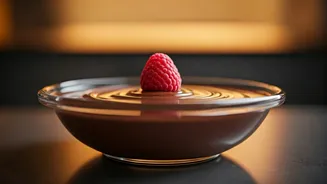


A Symphony of Flavour and Texture
Imagine a dessert that captures the essence of a perfect summer day. This Vanilla Mango Oat Milk Layered Pudding is exactly that. It’s a delightful paradox: rich and decadent, yet surprisingly light and dairy-free. The beauty lies in its simplicity and the quality
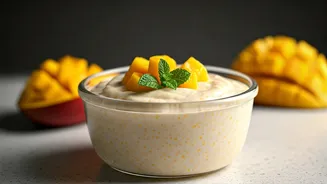
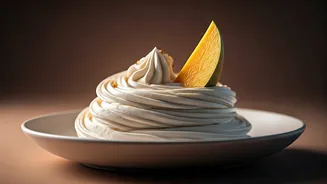
of its components. The vanilla layer is smooth and creamy, a comforting base infused with fragrant vanilla essence. Above it sits a vibrant, sun-kissed mango layer, bursting with the pure, unadulterated flavour of the king of fruits. Using oat milk gives the pudding a modern, plant-based twist, making it accessible to those with dairy sensitivities without compromising on a luxurious, creamy texture. It’s the kind of dessert that looks like it came from a high-end patisserie but is secretly simple enough to whip up in your own kitchen.
Gather Your Ingredients
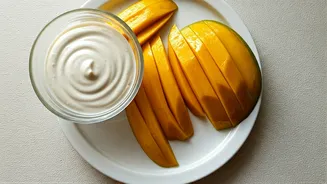
A great dessert starts with good ingredients. The quantities below are for approximately 4 individual servings. **For the Vanilla Pudding Layer:** * 500 ml Unsweetened Oat Milk * 4 tbsp Cornstarch (or arrowroot powder) * 3–4 tbsp Sugar (adjust to taste) * 1 tsp Vanilla Extract * A pinch of salt **For the Mango Pudding Layer:** * 2 large, ripe mangoes (preferably Alphonso or Kesar for best flavour), peeled and cubed * 2 tbsp Sugar (optional, depending on mango sweetness) * 2 tbsp Water * 1 tbsp Lemon Juice **For Garnish (Optional):** * Fresh mango cubes * Mint leaves * Toasted coconut flakes or slivered almonds
Crafting the Creamy Vanilla Layer
The foundation of our pudding is a perfectly smooth vanilla base. The trick is to avoid lumps and achieve a silky consistency. Start by taking a small bowl and mixing the cornstarch with about 4 tablespoons of the oat milk until you have a smooth, liquid paste. This step is crucial to prevent the cornstarch from clumping when it hits the heat. Next, pour the remaining oat milk into a medium-sized saucepan. Add the sugar and the pinch of salt. Place the saucepan over medium heat and stir until the sugar has completely dissolved. As the milk begins to warm up (but before it boils), slowly pour in the cornstarch slurry while whisking continuously. Keep whisking as the mixture heats. Within a few minutes, you’ll feel it start to thicken. Continue to cook and whisk for about 2-3 minutes until the pudding is thick and creamy, coating the back of a spoon. Remove from the heat and stir in the vanilla extract. Your vanilla layer is now ready.
Perfecting the Vibrant Mango Layer
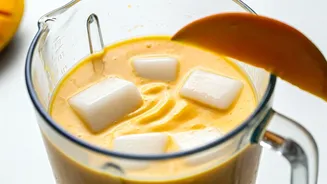
The success of this layer depends entirely on the mangoes. Choose ripe, fragrant, and non-fibrous ones for the smoothest puree. Place the cubed mangoes, sugar (if using), and water into a blender. Blend until you have a completely smooth, luscious puree. Taste the puree; if your mangoes were exceptionally sweet, you might not need any added sugar at all. Now, pour this vibrant puree into a small saucepan. Add the lemon juice, which helps to brighten the mango flavour and preserve its beautiful colour. Cook over low-medium heat, stirring occasionally, for about 5-7 minutes. The goal is not to cook it down too much, but just to thicken it slightly and deepen the flavour. It should have a consistency similar to a thick sauce. Once done, remove it from the heat and let it cool down a bit.
The Art of Assembly
Now for the fun part—creating those beautiful, distinct layers. Choose clear glasses or small dessert jars to show off your handiwork. First, divide the warm vanilla pudding evenly among your chosen glasses, filling each about halfway. Use a spoon to smooth the top. To create sharp layers, you need to let this layer set slightly. Place the glasses in the refrigerator for about 20–30 minutes. You want it firm enough so the next layer doesn't sink in, but not completely set. Once the vanilla layer is partially set, gently spoon the cooled mango puree on top. Be careful not to just dump it in; spoon it gently around the edges first and then fill in the middle to maintain a clean line between the layers. Smooth the top of the mango layer. Now, return the puddings to the refrigerator to chill completely, for at least 3-4 hours, or until firm. This chilling time is essential for the flavours to meld and the pudding to set properly.