





Why Start With the Wall?
The wall push-up is the perfect entry point into push-up training. By performing the movement standing up, you significantly reduce the amount of body weight you have to lift, making it much easier on your joints. This makes it an ideal exercise for beginners,
individuals recovering from injury, or anyone looking for a low-impact way to strengthen their chest, shoulders, and arms. Unlike floor push-ups, which can strain the wrists and shoulders, wall push-ups allow you to build foundational strength safely, focusing on form without the high load. They also engage your core to maintain a stable, straight body line throughout the movement.
Positioning Your Body for Success
Proper setup is the first step to an effective wall push-up. Stand facing a clear, sturdy wall. Place your feet about shoulder-width apart, a comfortable arm's length away from the wall. The further you stand from the wall, the more challenging the exercise will be. Your body should form a straight line from your head to your heels—think of it as a standing plank. Engage your core by gently tightening your abdominal muscles and squeezing your glutes. This prevents your hips from sagging, a common mistake that can lead to lower back strain.
Hand Placement: The Critical Detail
Where you place your hands matters. For a standard wall push-up, place your palms flat on the wall at shoulder height and slightly wider than shoulder-width apart. This position provides a balanced workout for your chest and triceps. You can modify your hand placement to target different muscles. A narrower, close-grip placement (hands closer than shoulder-width) will increase the workload on your triceps and inner chest. A wider grip will put more emphasis on the outer chest muscles. For beginners, sticking to the standard shoulder-width placement is recommended to build balanced strength and ensure safety.
Executing the Perfect Repetition
With your body and hands in position, you're ready to move. Inhale as you slowly bend your elbows, lowering your chest toward the wall. Aim to keep your elbows tucked at about a 45-degree angle to your torso, forming an arrow shape, not a 'T'. Flaring your elbows out too wide can put unnecessary stress on your shoulder joints. Lower yourself until your nose or forehead is close to the wall, maintaining that straight body line. Pause briefly, then exhale as you push firmly back to the starting position, fully extending your arms without locking your elbows. The key is a slow, controlled movement in both directions.
Common Mistakes and How to Avoid Them
To get the most out of every rep, watch out for a few common errors. The most frequent is sagging hips, which indicates a lack of core engagement. Fix this by consciously bracing your abs and glutes. Another mistake is letting the head drop or jut forward; your neck should always remain in a neutral position, aligned with your spine. Finally, avoid rushing. Quick, uncontrolled movements reduce the exercise's effectiveness and can increase the risk of injury. Focus on a smooth tempo, perhaps taking three to four seconds for the lowering phase.
Ready to Progress?
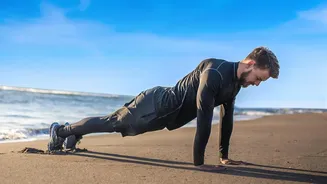
Once you can comfortably perform multiple sets of 10-15 wall push-ups with perfect form, it's time to increase the challenge. The simplest progression is to move your feet further back from the wall. This increases the angle and forces you to lift more of your body weight. From there, you can progress to incline push-ups by placing your hands on a lower, stable surface like a countertop or a sturdy bench. The lower the surface, the harder the exercise becomes, gradually preparing you for the challenge of a full floor push-up.