





From Pictures to Purpose
Many of us begin a decorating project by gathering images we love. A cosy armchair here, a bold paint colour there. The result is often a collection of beautiful but disconnected ideas. Professional designers, however, start differently. They treat a moodboard
as a design brief—a visual contract for the project. Its primary job isn't just to inspire, but to establish a clear direction. Before you pin a single image, the first step is to define the room's core purpose. This means moving beyond labels like 'living room' and getting specific about the activities that will happen within its walls. A moodboard's real power comes from answering functional questions first, which then guides every aesthetic choice you make.
Start With the 'Who, What, When'
To build a functional foundation, grab a notebook and answer a few key questions. These questions reveal what a moodboard of only images never will. First, who uses the room? Is it a high-traffic zone for the whole family, a quiet retreat for one, or a space for entertaining guests? Next, what activities will take place? Be specific. Does 'living' mean hosting movie nights, building forts with kids, reading by the window, or all of the above? Finally, when is the room used most? A space used primarily in the evenings will have different lighting needs than one that gets bright morning sun. Think about the practicalities. Do you need durable, stain-resistant fabrics? Is storage a major problem that needs solving? Answering these behaviour-based questions helps you design for your actual life, not just for a picture.
Define the Feeling
Once you know what the room needs to do, you can decide how you want it to feel. The function directly informs the mood. A playroom should feel energetic and playful, while a primary bedroom might need to feel serene and restful. This is where you can start using keywords. Write down three to five words that capture the desired atmosphere. Words like 'calm, airy, natural' will lead you toward a completely different set of materials and colours than 'vibrant, social, dramatic'. These keywords become your filter. As you start gathering ideas, you can ask yourself, 'Does this support a 'calm' feeling?' This step bridges the gap between the room's practical job and its emotional impact, ensuring the two work in harmony.
Collect Your Functional Clues
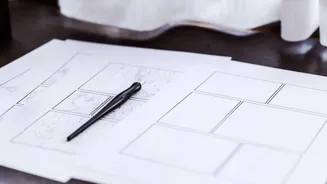
Now it’s time to start creating your board, but don't just jump to pretty pictures. Your board should include text and functional elements. Add your keywords and a written summary of the room's purpose right at the top. If the room needs to solve a problem, like a lack of light, add a note: 'Priority: Maximise natural light and add warm, layered evening light'. Include rough layout sketches. Where will the main furniture go to support the room's activities? Add key dimensions. Note the size of the wall where the sofa must go or the space available for a desk. This is the stage to consider non-negotiables. If you already own a large piece of furniture that must stay, a photo of it should be on your board. This ensures that all new elements are chosen in context.
Now, Make It Beautiful
With the functional framework in place, you can confidently build the aesthetic layer. Start gathering inspirational images, but use your functional brief and feeling keywords as a guide. Collect samples of colours, fabrics, and materials. A physical moodboard is excellent for this, as it allows you to see and feel textures together in natural light. Look for images that solve your stated problems. If you need clever storage, search for 'stylish and practical living room storage'. If you need durable fabrics, look for inspiration that uses them beautifully. This approach turns the process from a random collection of likes into an intentional search for solutions. Your final moodboard will be a rich, thoughtful tool that is not only beautiful but serves as a true design roadmap, ensuring the finished room works as good as it looks.