


The Roaring Twenties: Sculpted Finger Waves
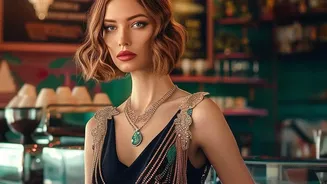
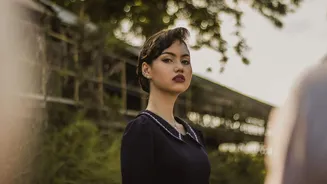
The 1920s were all about liberation, and hairstyles reflected this with short, dramatic cuts. Finger waves, the iconic S-shaped pattern sculpted close to the head, defined the flapper look. While they look intricate, creating them at home is a matter
of patience and the right product. You’ll need very wet hair, a strong-hold gel or mousse, and a fine-toothed comb. Start with freshly washed, soaking wet hair and create a deep side part. Apply a generous amount of gel. Working in sections, use your comb to push the hair forward into a 'C' shape, placing a finger down to hold the ridge. Then, comb the hair back in the opposite direction to form the next part of the 'S'. The key is to keep the hair flat against the scalp. You can use clips to hold the waves in place as they air-dry or as you sit under a hooded dryer for a long-lasting finish.
The Wartime Forties: Classic Victory Rolls
Victory rolls were a popular and practical hairstyle during the 1940s, named in a nod to the victory maneuvers of fighter pilots during World War II. This look is characterized by voluminous curls of hair that are pinned on top of the head or framing the face. To achieve this style, it’s best to work with day-old hair, as it has more grip. Start by separating a section of hair at the front. Tease the section at the roots to create volume. Then, holding the ends of the hair, wrap them around two fingers and roll the hair towards your scalp. Once you have a neat roll, carefully slide your fingers out and secure the roll in place with bobby pins. Hiding the pins inside the roll is key to a polished look. A strong-hold hairspray is essential to keep everything in place. You can create one roll for a statement look or one on each side of your part for a classic symmetrical style.
The Swinging Sixties: The Beehive
The 1960s were a decade of height and volume, with the beehive as its crowning glory. Made famous by icons like Audrey Hepburn and Dusty Springfield, this style is all about a dramatic bouffant piled high on the head. A modern, at-home version is easier than it looks. The secret is backcombing, also known as teasing. Section off the top part of your hair, from your hairline to the crown. Leave a thin layer of hair at the very front smooth. Working with the sections behind it, hold the hair taut and use a comb to push down towards the scalp. This creates a cushion of teased hair. Once you have enough volume, gently smooth the top layer of hair over the teased section to hide the backcombing. Gather the hair and pin it at the back of your head, shaping the 'beehive' as you go. Some stylists suggest using a 'hair rat' or even a clean bath loofah as a base to create the shape more easily. Finish with a generous amount of hairspray to lock in the height.
The Groovy Seventies: Feathered Layers
The 1970s ushered in a more natural, free-flowing aesthetic, perfectly captured by the iconic feathered hairstyle made famous by Farrah Fawcett. This look is all about soft layers, a centre part, and voluminous wings that flick away from the face. To get this style, you’ll need a round brush and a blow dryer or a large-barrel curling iron. Start with a centre part. When curling, the most important rule is to always curl the hair away from your face. Take one-inch sections of hair and wrap them around the curling iron, directing the curl outwards and backwards. After releasing the curl, you can use your fingers to gently fluff and separate the layers. For the front sections or bangs, blow-dry them away from your face to create that signature feathered 'flick'. This style relies on movement and bounce, so avoid heavy products that might weigh the hair down. A light hairspray will provide hold without sacrificing the soft, airy feel.