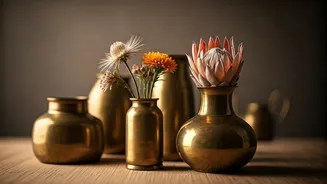


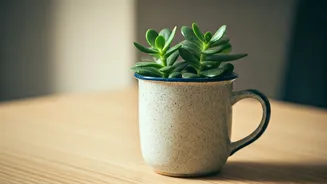


The Charm of Brass
Before you begin, take a moment to appreciate your raw materials. Vintage brass has a unique character that modern materials often lack. Whether it’s a small katori (bowl), a sturdy tumbler, a traditional lota, or even a section of an old tiffin carrier,
each piece tells a story. The warm, golden hue of polished brass can brighten up any corner, while the deep, greenish patina of aged brass adds a touch of rustic elegance. This project isn't just about creating a planter; it's about celebrating heritage and craftsmanship by giving it a contemporary, green twist. These small, heavy-bottomed utensils are surprisingly perfect for housing small plants, providing a stable and stylish base that fits beautifully on a desk, windowsill, or bookshelf.
Gather Your Tools and Materials
A successful project starts with good preparation. You won't need a professional workshop, but having the right items on hand will make the process smooth and enjoyable. Here’s your checklist: * **Vintage Brass Utensils:** The stars of the show! Choose pieces that are deep enough to hold a small amount of soil. * **Small Indoor Plants:** Succulents, cacti, air plants, or cuttings from plants like pothos or spider plants work best. * **Potting Mix:** A well-draining mix, preferably one formulated for succulents and cacti. * **Small Pebbles or Gravel:** For drainage at the bottom of your planter. * **A Drill with a Small Bit:** Optional, but highly recommended for creating drainage holes. * **Brass Cleaner or a DIY Paste:** (Lemon juice and salt, or vinegar and flour work well) if you want a shiny finish. * **A Soft Cloth:** For polishing.
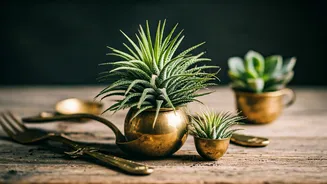
Choosing the Right Green Companion
The key to a long-lasting brass planter is choosing a plant that can thrive in a small container and doesn't require constant watering (which can accelerate tarnishing). Succulents are a top choice. Varieties like Echeveria, Haworthia, and Sedum are small, beautiful, and drought-tolerant. Small cacti are another excellent, low-maintenance option. If you prefer a more leafy look, consider a small 'starter' spider plant or a few cuttings from a money plant (pothos). These are hardy and will happily live in a small space for a good while. Air plants (Tillandsia) are the easiest of all—they require no soil and can simply be placed artfully inside the brass vessel.
Step 1: Prep and Polish
First, decide on the look you want. Do you love the bright, reflective gleam of new brass, or the sophisticated, moody look of aged patina? If you want it to shine, give your utensil a thorough cleaning. You can use a commercial brass polish or make a simple, effective paste at home by mixing equal parts salt and flour with enough white vinegar to form a paste. Apply it to the brass, let it sit for about 10 minutes, then rinse and buff dry with a soft cloth. If you prefer the aged look, simply wash the utensil with soap and water to remove any dirt or grime, and dry it completely.
Step 2: Ensure Proper Drainage
This step is crucial for the health of your plant. Most indoor plants, especially succulents, will die if their roots sit in water. The best solution is to drill a few small drainage holes in the bottom of your brass utensil. Using a drill with a small metal bit, apply gentle, steady pressure to create 2-3 small holes. Place a piece of wood underneath to protect your work surface. If you don't have a drill or are hesitant to drill into an heirloom, you can create a drainage layer instead. Place a 1-2 cm layer of small pebbles or gravel at the bottom of the utensil. This creates a reservoir for excess water to collect, keeping it away from the plant's roots. However, you will need to be much more careful with watering if you choose this method.
Step 3: Time to Plant
Now for the fun part. If you didn't drill holes, start with your layer of pebbles. Next, add a small amount of your potting mix. Gently remove your chosen plant from its nursery pot, lightly loosening the root ball with your fingers. Place it inside the brass utensil, ensuring the top of the root ball sits just below the rim. Fill in the surrounding space with more potting mix, gently pressing it down to secure the plant. Be careful not to pack it too tightly. Give the plant a very small amount of water—just enough to settle the soil. For succulents, a tablespoon or two is often enough for the first watering.
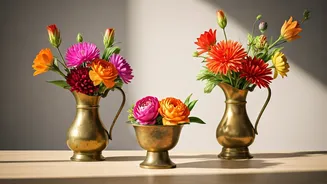
Styling Your New Creation
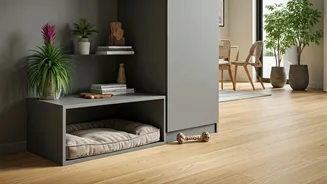
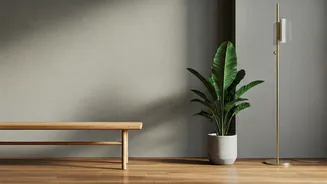
Your quirky brass planter is ready for its debut! These small statement pieces look wonderful on their own or grouped together. Place one on your work-from-home desk to bring a bit of nature indoors. Line up a few different ones on a windowsill where they can catch the light. A trio of mismatched brass tumblers, each with a different succulent, can make a stunning and personal centrepiece for your dining table or coffee table. They are conversation starters and a beautiful reminder that with a little creativity, the old can be made new again.