


The Magic of the Paneer-Chilla Pairing
Why does adding paneer to a chilla work so well? It’s all about a beautiful contrast of textures and a boost in flavour and nutrition. The classic besan (chickpea flour) chilla has a slightly crisp exterior and a soft, fluffy inside. When you introduce
crumbled paneer, you get pockets of creamy, melt-in-your-mouth goodness that complement the chilla’s savoury base. Paneer is a fantastic carrier of flavour; it readily absorbs the spices you mix into it, creating a zesty, aromatic filling. Furthermore, it turns a light snack into a substantial, protein-packed meal that keeps you full for longer. It’s the difference between a simple snack and a satisfying, wholesome dish that feels both comforting and a little bit indulgent.
Step 1: The Perfect Chilla Batter
The foundation of a great paneer chilla is, of course, the chilla itself. A lumpy or bland batter will ruin the experience. For a foolproof besan batter, you’ll want to get the consistency just right—not too thick, not too thin, similar to a standard pancake batter. **Ingredients:** - 1 cup besan (chickpea flour) - Approx. 1 to 1.25 cups water - ¼ teaspoon turmeric powder (haldi) - ½ teaspoon ajwain (carom seeds) - ½ teaspoon red chilli powder (optional) - Salt to taste - 1 tablespoon chopped coriander leaves **Method:** In a mixing bowl, add the besan, turmeric, ajwain, chilli powder, and salt. Slowly pour in the water while whisking continuously to avoid lumps. A wire whisk works best here. Once you have a smooth, flowing batter, stir in the chopped coriander. Let the batter rest for 15-20 minutes. This allows the besan to hydrate properly, resulting in softer chillas.
Step 2: The Savoury Paneer Filling
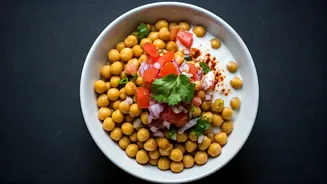
While the batter rests, prepare your star ingredient. The filling is where you can get creative, but a simple, well-spiced mix is often the most effective. This recipe provides a classic, crowd-pleasing flavour profile. **Ingredients:** - 1 cup crumbled paneer (about 150-200g) - 1 small onion, finely chopped - 1 green chilli, finely chopped - ¼ cup chopped coriander leaves - ½ teaspoon chaat masala - Salt to taste **Method:** In a separate bowl, combine the crumbled paneer, finely chopped onion, green chilli, and coriander. Sprinkle the chaat masala and a pinch of salt over the mixture. Be gentle with the salt, as the chilla batter already contains it. Mix everything together gently with a fork. You want the ingredients to be well-distributed without mashing the paneer into a paste. Taste and adjust the seasoning if needed.
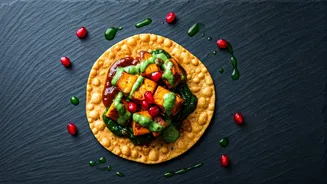
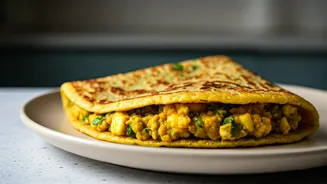
Step 3: Cooking and Assembly
Now it’s time to bring it all together. Heat a non-stick tawa or a well-seasoned cast-iron pan over medium heat. Lightly grease it with a few drops of oil or ghee. Once hot, pour a ladleful of the chilla batter onto the centre and quickly spread it outwards in a circular motion to form a thin pancake. Drizzle a little oil around the edges. Let it cook for about two minutes, or until the top looks cooked and the edges start to lift from the pan. Spoon a generous amount of the paneer filling onto one half of the chilla. Using a spatula, gently fold the other half over the filling. Press down lightly and cook for another 30-40 seconds. Your special paneer chilla is now ready.
Tips for Chilla Perfection
To ensure your chillas turn out perfectly every time, keep these simple tips in mind. - **Heat Management is Key:** The pan should be hot enough to cook the chilla quickly but not so hot that it burns before cooking through. A medium flame is ideal. - **Use a Non-Stick Pan:** While not essential, a non-stick tawa makes the process much easier, preventing the chilla from sticking and ensuring an easy flip and fold. - **Don't Skip the Resting Time:** Letting the batter rest is crucial for a smooth texture. It makes a noticeable difference. - **Serve Immediately:** Chillas are best enjoyed hot and fresh, straight off the pan. They lose their crispness as they cool. Serve them with a side of green chutney, tomato ketchup, or a simple yogurt dip.