







Start with a Reverse Image Search
The most effective first step is a reverse image search. Instead of typing words, you provide an image and ask a search engine to find where it appears online. Google Lens is the most powerful and accessible tool for this. You can upload an image, paste
a URL, or even drag and drop a picture directly into the search bar. The results will show pages where the exact image is used, as well as visually similar ones. For more specialised searches, TinEye is an excellent alternative. It excels at finding exact or modified copies of an image and can often track its usage history across the web, making it great for copyright and source verification. For the best results, it's often wise to use both Google and TinEye, as their indexes and strengths are different.
Analyse the Image's Hidden Data
Many digital photos contain hidden information called metadata or EXIF data. This can include the date and time the photo was taken, the camera or phone model used, and sometimes even GPS coordinates of where the picture was shot. While many social media platforms strip this data when images are uploaded, the original file might still contain it. You can view this data without special software. On a Windows PC, right-click the image file, select 'Properties', and then go to the 'Details' tab. On a Mac, you can right-click the file and select 'Get Info' or use the 'Show Inspector' tool in the Preview app. Online tools like Get-Metadata.com or Pics.io's viewer also allow you to upload an image and see its data for free. These details can provide crucial clues about the image's authenticity and origin.
Look for Clues Within the Image Itself
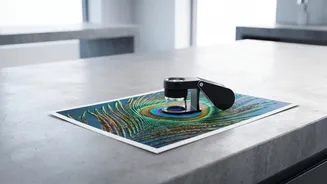
Beyond technical analysis, the image itself is a treasure trove of clues. Scrutinise the frame for any text, such as street signs, logos on clothing, or writing on buildings. These can be searched online to narrow down the location or subject. Landmarks, architecture style, and even the type of vegetation can help you geolocate a photo. If you see a recognisable building, you can cross-reference it with mapping services. Pay attention to details that might suggest a specific country or region, like the side of the road cars are driving on or the design of license plates. Combining these visual observations with keyword searches can often unlock the context you're missing.
Beware of AI-Generated Fakes
The rise of artificial intelligence means that some of the most convincing images have no real-world source at all. AI image generators like Midjourney, DALL-E, and Stable Diffusion can create photorealistic scenes from text prompts. While impressive, this technology is also used to create misinformation. Detecting AI-generated images requires a keen eye for subtle flaws—look for unnatural textures, strange patterns, and bizarre details, especially in hands, text, and complex backgrounds. For a more definitive check, you can use specialised AI detection tools. Websites like WasItAI and Imagedetector.com allow you to upload an image and receive an analysis of whether it was likely created by AI. These tools scan for digital fingerprints and patterns unique to AI models, offering another layer of verification.
Use Advanced Search Techniques
If initial searches don't yield results, you can refine your hunt with advanced search operators. In Google Images, you can use operators to filter your search with more precision. For example, using 'site:' followed by a domain name (e.g., 'site:example.com') restricts the search to a specific website, which is useful if you suspect an image came from a particular news outlet or blog. You can also filter by image size, usage rights, or time of publication to narrow down the possibilities. Another powerful, though more technical, operator is 'src:', which finds pages that directly link to a specific image URL, helping to uncover where an image is being 'hotlinked' from.