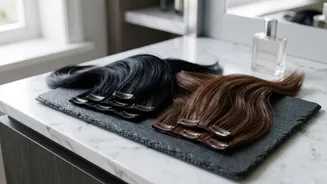



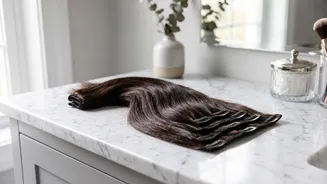

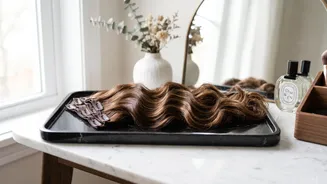
The Foundation: Building Volume and Length
The most common use for clip-ins is to add overall volume and length. The key to a natural look is strategic, layered placement. Start by creating a clean, horizontal part at the nape of your neck, clipping the rest of your hair up and out of the way.
This is where you'll place your first, usually smaller, weft. For a secure hold, especially on fine or silky hair, gently tease the roots of your hair where the clips will go. You can also add a light spritz of dry shampoo or texture spray for extra grip. Work your way up the back of your head, creating new horizontal parts about an inch above the previous weft. A 'bricklaying' pattern, where wefts are staggered rather than stacked directly on top of each other, helps create a more natural distribution of hair. Use your widest wefts at the widest part of your head, typically around the middle back section.
The Sides: Framing Your Face
Once the back is complete, it's time to address the sides. To add volume here, use the smaller, two-clip or one-clip wefts. Create a parting about two inches above your ear, ensuring you leave enough of your own hair to fall over the top and conceal the weft. Some stylists recommend placing these side pieces at a slight diagonal angle, following the natural curve of your head, for a more believable blend. A critical rule is to never place wefts too high up or too close to your hairline or part. This is the most common mistake and the number one reason extensions become visible. Always leave a generous 'safe zone' of your own hair around your face and along your part to ensure the clips remain hidden.
The High Ponytail Challenge
Wearing your hair up, especially in a high ponytail, requires a different placement strategy. If you place wefts horizontally like you normally would, they can create bumps or become visible. The solution is to change the direction of your clips. One popular method involves applying the clip-in wefts upside down, so they lie flat against the head when you pull your hair upwards. Another technique is to place smaller wefts vertically or diagonally, following the direction the hair will be pulled into the ponytail. For a sleek look, you can also wrap wefts directly around the base of your ponytail to build thickness, securing them as you go. To finish, take a strand of hair (either from the extension or your own) and wrap it around the base to conceal the hair tie and any visible clips.
Mastering the Half-Up Style
For a half-up, half-down look, the goal is to concentrate the volume in the lower section of your hair. Section off the top portion of your hair that you intend to pull up and clip it out of the way. Then, apply your wefts to the lower half of your hair, starting from below where your top section is parted. This ensures that no clips will be visible when you tie up the top section. You can use your standard bricklaying pattern here to build fullness in the hair that will remain down. Always double-check by letting the top section down to ensure it provides enough coverage over the highest weft before you finalize the style.
Blending for a Seamless Finish
Proper placement is only half the battle; the other half is blending. Once all your clips are in place, gently brush through your hair to merge the extensions with your natural locks. Adding texture, like waves or curls, is one of the most effective ways to hide any subtle lines where your natural hair ends and the extensions begin. Style your hair and the extensions together to create a unified look. If your natural hair is particularly short, you can try braiding the very bottom layer at your nape and clipping the first weft onto that braid. This hides the shortest hairs, which are often the most difficult to blend.