






More Than Tidying: What Is a Pantry Audit?
A pantry audit is more than just a quick tidy-up. It's a strategic process of taking stock of every single food item you have in your cupboards, freezer, and fridge. The goal isn't just to make things look neat; it's to create a functional system where
you know exactly what you have and what you need. This information gap—not knowing what's hiding in the back of the shelf—is the primary reason we end up with three jars of the same spice or multiple bags of flour. By creating a clear picture of your inventory, you turn your pantry from a zone of chaos into a well-managed resource.
The Real Cost of Duplicates
Buying in bulk is a smart way to save money, but only if you use what you buy. Duplicate purchases directly lead to food waste, which has a significant financial and environmental cost. When a newer item is placed in front of an older one, the original is often forgotten until it expires. This cycle of over-purchasing, especially with bulk items, means you're not only wasting food but also the money you spent on it. A simple audit helps you use what you have, ensuring that the savings from buying in bulk are realised instead of being thrown away.
Step 1: The Great Empty-Out
The first step is the most dramatic but also the most crucial: take everything out. Empty every shelf in your pantry and cupboards. While it might seem daunting, this is the only way to get a true sense of what you've accumulated. As you take items out, group similar things together—all the pasta, all the canned goods, all the baking supplies. This initial sort will immediately reveal the extent of your duplicate bulk purchases. Before putting anything back, take the opportunity to wipe down and clean the empty shelves for a fresh start.
Step 2: Sort, Purge, and Categorise
With everything laid out, it's time to make decisions. Check the expiration dates on everything. Be ruthless: toss anything that has expired or spoiled. For non-perishable items that are still in date but you know you'll never use, consider donating them to a local food bank. As you sort, refine your categories. You might have broad groups like 'grains' and 'sauces', or get more specific with 'breakfast items' and 'snacks'. The goal is to create a logical system that works for you and how you cook.
Step 3: Reorganise for Visibility
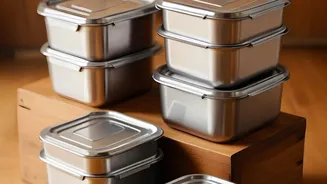
Now, you can put everything back in an organised way. The key principle is visibility. Use clear, airtight containers for bulk items like flour, sugar, and rice so you can see quantities at a glance. Arrange items so that taller things are at the back. Implement the 'First-In, First-Out' (FIFO) method by placing newer items behind older ones to ensure you use up what you have before it expires. Consider creating a dedicated 'use first' bin for items that are open or nearing their expiration date.
Step 4: Create a Living Inventory
This is the step that prevents future duplicates. Create an inventory of what you have. This doesn't need to be complicated. It can be a simple notepad on the fridge, a whiteboard in the pantry, or a spreadsheet. There are also numerous pantry management apps available that connect your inventory to your shopping list. Whenever you use up an item, cross it off or remove it. Before you go shopping, your first stop should be consulting this list, not the grocery store. This habit of 'shopping your pantry first' is the ultimate way to save money and stop waste.