


The Rise of the Countertop Garden
In the quest for fresher food and a more sustainable lifestyle, a simple but brilliant trend is taking root in Indian kitchens. It’s called countertop farming, and its premise is wonderfully straightforward: using discarded food packaging as free planters
for growing small-scale crops. This isn't about complex hydroponics or expensive kits. It’s about the humble plastic punnet that held your strawberries, the clear-lidded tray from your takeaway biryani, or the black tray from your button mushrooms. These everyday items are being given a second life, transforming from single-use waste into vessels for vibrant, edible greens. This approach tackles three modern concerns at once: it reduces household waste, cuts down on grocery bills, and puts the freshest possible ingredients within arm's reach, no garden required.
Choosing Your Recycled Planters
Almost any shallow plastic container can become a potential home for your new plants, but some are better than others. Look for trays that are at least two inches deep to allow for a decent layer of growing medium. Clear plastic takeaway containers with lids are fantastic as they create a mini-greenhouse effect, helping seeds to germinate faster. Trays from mushrooms, berries, and cherry tomatoes are also ideal candidates. Before you begin, give them a thorough wash with soap and hot water to remove any food residue and ensure they are hygienic. The most crucial first step is to create drainage. Without it, your seeds will rot. Use a skewer, a small drill bit, or the tip of a pair of scissors to carefully poke several small holes in the bottom of the tray. This allows excess water to escape, keeping the roots healthy.
What to Grow: Easy Wins for Beginners
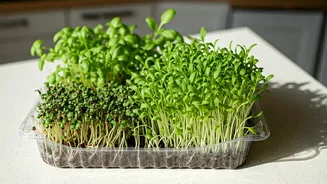
The key to successful countertop farming is choosing plants that grow quickly and don't require deep soil. This is where microgreens and herbs shine. Microgreens are simply the young seedlings of vegetables and herbs, harvested just after the first true leaves have developed. They are packed with flavour and nutrients, often containing higher concentrations of vitamins than their mature counterparts. Excellent choices for beginners include mustard, radish, coriander (dhania), fenugreek (methi), and even broccoli. These seeds germinate rapidly, and you can be harvesting in as little as 7-14 days. You can also start common herbs like basil and mint, or even grow a steady supply of spring onions by planting the white root ends from a bunch you bought at the market.
A Simple Step-by-Step Guide
Ready to get started? First, fill your clean, perforated tray with a growing medium. A light, fluffy potting mix or coco peat (kokum) works best. Moisten the soil lightly with a spray bottle—it should be damp, not waterlogged. Next, sprinkle your chosen seeds evenly and generously over the surface. For microgreens, you want a dense covering. Gently press the seeds into the soil, but you don't need to bury them deep. Cover them with a very thin layer of soil or leave them exposed. Place the tray in a spot that gets good, indirect sunlight, like a kitchen windowsill. A north-facing window is often perfect. If you’re using a container with a lid, keep it on until the seeds sprout. Water gently every day with a spray bottle to keep the soil moist.
Harvesting Your Fresh Bounty
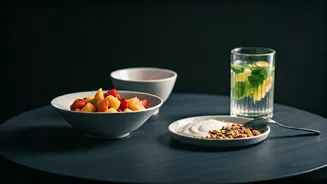
The most satisfying step is the harvest. For microgreens, you'll know they're ready when they are about 2-3 inches tall and have developed their first set of 'true' leaves (the second pair of leaves that appear). To harvest, use a pair of clean scissors and simply snip the greens just above the soil line. You don't need to wash them if you've kept your setup clean, but you can if you prefer. Add them immediately to salads, sandwiches, soups, or as a garnish for dal and curries for a burst of fresh flavour and a nutrient boost. Most microgreens are a one-time harvest, so after you've snipped them all, you can compost the roots and soil and start a fresh batch.