


Looking for a lunch that is satisfying, healthy, and incredibly easy to prepare? A chickpea sandwich offers the perfect solution. This plant-based powerhouse is not only packed with protein and flavour but is also endlessly customisable.
The Ultimate Lunch Upgrade
Move over, traditional
sandwich fillings. The chickpea salad sandwich has earned its place as a modern classic for good reason. It's a fantastic option for a quick weekday lunch, a portable meal for work, or a simple, no-cook dinner on a busy evening. Using canned chickpeas makes the preparation time minimal—often under 15 minutes. The result is a creamy, chunky, and savoury filling that rivals old-school deli salads in satisfaction while being entirely plant-based.
Gather Your Core Ingredients
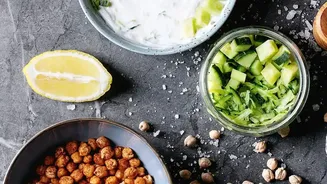
The beauty of this recipe lies in its simplicity and reliance on pantry staples. At its heart, you only need a few key items. Start with a can of chickpeas, rinsed and drained. For the creamy base, mayonnaise is the classic choice, but you can use a vegan version to keep it plant-based. For crunch and flavour, finely diced celery and red onion are essential. A touch of lemon juice brightens all the flavours, while Dijon mustard adds a subtle tang. Finally, simple seasonings like salt, pepper, and garlic powder bring it all together.
The Simple Step-by-Step Method
Preparing the filling is as easy as 'mash and mix'. First, place the drained and rinsed chickpeas in a medium bowl. Using a fork or a potato masher, mash them to your desired consistency. Some people prefer a smoother texture, while others like to leave some chickpeas whole for a chunkier bite. Next, add the mayonnaise, lemon juice, mustard, and seasonings, and stir until well combined. Then, fold in your finely chopped celery and onion. Give it a final mix, taste, and adjust the seasoning if needed—it’s that straightforward.
Perfecting the Texture
The ideal texture is a matter of personal preference. For a chunkier, more rustic filling, a simple fork or potato masher is your best tool. This method allows you to control the consistency easily, leaving some beans partially intact for a more varied bite. If you prefer a smoother, more uniform filling, you can give the chickpeas a few quick pulses in a food processor. Be careful not to overprocess, as you want to avoid turning the mixture into hummus. The goal is a broken down, chunky texture, not a completely smooth puree.
Customise Your Creation
This is where you can truly make the recipe your own. The base is a perfect canvas for a wide array of additions. For a briny kick, add chopped pickles, relish, or capers. Fresh herbs like dill, parsley, or chives add a burst of freshness. For a touch of spice, consider a pinch of curry powder, smoked paprika, or red pepper flakes. Some recipes even incorporate sweet elements like chopped apples or raisins for a surprising contrast. Don't be afraid to experiment with different vegetables like grated carrots or chopped bell peppers for extra crunch and nutrients.
Serving and Storage Solutions
The most obvious way to serve your chickpea filling is between two slices of your favourite bread, perhaps toasted and layered with crisp lettuce and tomato slices. However, its versatility doesn't stop there. Use it as a filling for wraps or pitas, spoon it into lettuce cups for a lighter option, or serve it as a dip with crackers and fresh vegetables. The prepared filling can be stored in an airtight container in the refrigerator for up to five days, making it perfect for meal prepping. For the best results and to avoid soggy bread, it's recommended to assemble the sandwiches just before eating.