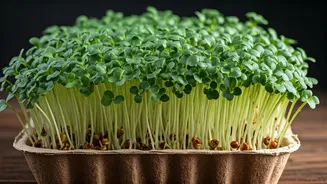


Why Cardboard Is Your Secret Weapon
Forget expensive pots and special seed trays. The humble cardboard tray is the perfect starting point for your microgreen journey. First, it’s a brilliant act of upcycling, giving a new purpose to delivery boxes or food packaging. It's completely free
and readily available. Second, cardboard is biodegradable. Once your microgreens are harvested and the tray has served its purpose, you can simply compost it, leaving behind zero plastic waste. This makes it an incredibly sustainable choice for the eco-conscious urban gardener. Finally, its shallow nature is ideal for microgreens, which don’t require deep soil to thrive. Cardboard provides just enough structure to hold the soil and seeds during their short growth cycle.
Gathering Your Simple Supplies
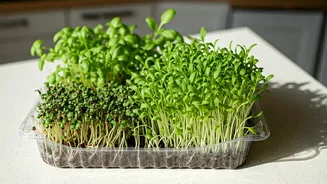
The beauty of this method is its simplicity. You likely have most of these items at home already. Here’s what you’ll need: * **Cardboard Trays:** Look for shallow cardboard boxes, like the ones used for packaging canned drinks, shoe boxes, or even sturdy egg cartons. Avoid cardboard with a glossy, waxy finish or heavy, colourful inks. Plain brown corrugated cardboard is best. Cut it down so the sides are about 2-3 inches high. * **Potting Mix:** A light, fluffy potting mix or coco peat (coir) works perfectly. Avoid heavy garden soil which can become too compact. * **Microgreen Seeds:** Choose seeds that are known to be fast and easy growers. * **Spray Bottle:** For gentle watering. * **Scissors:** For harvesting.
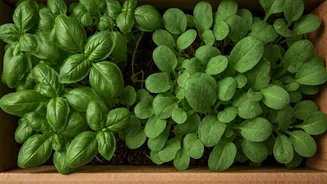
Choosing the Best Beginner Seeds
Not all seeds are created equal for beginners. You want fast-growers that are forgiving. For Indian kitchens, some of the best and most easily available options include: * **Mustard (Rai):** Peppery and incredibly fast, you can often harvest these in just over a week. * **Radish (Mooli):** Another quick-grower with a spicy kick. The colourful pink or red stems also look beautiful. * **Fenugreek (Methi):** A staple in Indian cooking, growing methi microgreens gives you fresh leaves with that classic, slightly bitter flavour perfect for dals and curries. * **Pea Shoots:** Sweet and crunchy, these are a favourite for their substantial texture and fresh flavour. They may take a little longer, but are well worth it. Start with just one or two types to get the hang of the process before diversifying your indoor farm.
Step 1: Prepare and Plant
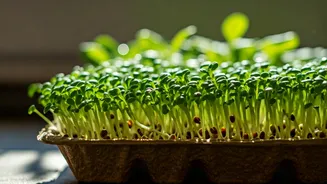
Now for the fun part. Take your cardboard tray and, if it has any gaps in the bottom, you can line it with a single sheet of paper towel to prevent soil from falling out initially. Fill the tray with about 1-2 inches of your potting mix or coco peat. Gently press it down to create a flat, even surface. Don’t compact it too tightly. Next, sprinkle your seeds evenly and densely across the entire surface of the soil. You want them to be close together, almost like a carpet. Unlike planting vegetables in a garden, microgreens thrive when crowded. Once sown, gently press the seeds into the soil with your palm to ensure good contact. Do not bury them. Give the seeds a thorough misting with your spray bottle until the soil is damp but not waterlogged.
Step 2: Care and Growth
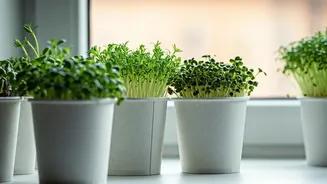
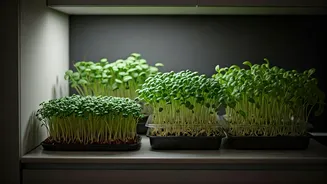
For the first 2-3 days, your seeds need darkness to germinate. You can cover your tray with another piece of cardboard or place it in a dark cupboard. Mist them once or twice a day to keep the soil moist. After you see the first tiny sprouts emerge (they will likely be yellowish), it’s time to introduce them to light. Place your tray on a sunny windowsill where it can get at least 4-6 hours of indirect sunlight. If you don’t have a sunny spot, a simple desk lamp will also work. Continue to mist your microgreens daily. Good air circulation is key to preventing mould, so avoid overly stuffy corners.
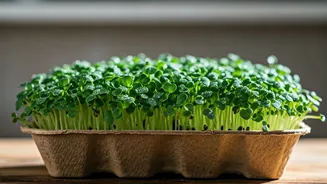
Step 3: Harvest Your Bounty
Your microgreens will be ready to harvest in about 7 to 14 days, depending on the variety. They are ready when they have developed their first set of true leaves (the second set of leaves that appear after the initial two starter leaves). To harvest, hold the tops of the greens and use a sharp pair of scissors to cut the stems just above the soil line. It’s best to harvest them as needed, right before you plan to eat them, to ensure they are at their freshest and most nutritious. You can rinse them gently in cool water before adding them to sandwiches, soups, salads, or as a garnish on your favourite dishes.