

The Hidden Dangers in Old Pots
It’s tempting to simply brush out the old soil and reuse a pot, but a quick rinse isn’t enough to protect your new plant. Leftover soil and residue on the pot's surface can be a breeding ground for a host of problems. Fungal spores, which cause diseases
like root rot and powdery mildew, can easily survive in old containers. Bacterial pathogens are another major concern, capable of infecting a new plant before it has a chance to establish itself. Beyond microscopic threats, old pots can hide the eggs and larvae of common pests such as spider mites, aphids, and fungus gnats, which are ready to hatch and infest your new plant. Taking the time to properly clean your pots eliminates these risks and gives your plant a clean slate for healthy growth.
Your Three-Step Cleaning Process
A thorough cleaning involves more than just a quick scrub. The goal is to first remove physical debris and then disinfect the surface. Start by emptying the pot and using a stiff brush to scrub away all remaining soil, salt deposits, and mineral buildup from both the inside and outside surfaces. Pay special attention to the white, crusty lines that often form from hard water and fertilizer. After this initial dry scrub, wash the pot with soapy water, using a mild dish detergent, and rinse it thoroughly. This step removes the bulk of the grime and prepares the pot for disinfection, which is the most critical part of the process. Skipping straight to disinfectant is less effective because organic matter can deactivate the cleaning agent.
The Disinfection Soak
Once your pot is physically clean, it’s time to sterilize it. The most common and effective method is a bleach soak. Prepare a solution of one part household bleach to nine parts water. It's important to wear gloves and add the bleach to the water (not the other way around) to prevent splashing. Submerge the clean pots in this solution for at least 10 to 30 minutes to kill any remaining pathogens. For those who prefer a non-bleach alternative, a vinegar solution can also be used. While some sources suggest various ratios, a mix of one part white vinegar to four parts water is a common recommendation for removing mineral deposits and providing some cleaning power, though it may be less effective against serious pathogens than bleach. Isopropyl alcohol (rubbing alcohol) can also be used by wiping down all surfaces of the pot.
Special Care for Different Materials
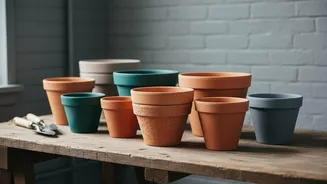
The type of pot you have will influence your cleaning process. Plastic and glazed ceramic pots are non-porous, which makes them relatively easy to clean and disinfect. A 10-minute soak in a bleach solution is usually sufficient after scrubbing. Terracotta and clay pots, however, are porous. This means they absorb water, minerals, and unfortunately, pathogens. Because of their porous nature, they require a more thorough soak—at least 30 minutes in a disinfectant solution—to ensure the cleaner penetrates the material. They will also take much longer to dry. Some gardeners even use a dishwasher to clean their pots; the hot water aids in sterilization, but you should avoid the heated dry cycle for plastic pots.
The Final Rinse and Dry
This last step is just as crucial as the others. After disinfecting, you must rinse the pots thoroughly with clean water to remove any chemical residue. Leftover bleach or other disinfectants can be harmful to a plant's sensitive roots. Once rinsed, allow the pots to air dry completely. Placing them in the sun is a great option, as the UV rays provide an extra layer of natural sanitization. For porous terracotta pots, it is especially important that they dry fully before use. A dry terracotta pot can wick moisture away from fresh soil, so giving it time to dry ensures it won't dehydrate your new plant. Once completely dry, your pot is finally ready to become a safe and healthy home for your new plant.