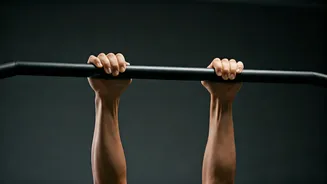









What Exactly Is a Dead Hang?
At its core, the dead hang is exactly what it sounds like: hanging passively from a pull-up bar or another sturdy overhead anchor. With your feet off the ground, you allow gravity to do the work, gently stretching your entire body from your hands to your hips.
While it looks simple—and it is—this single movement is a powerhouse for upper body health. It’s a foundational exercise that builds grip strength, improves shoulder mobility, and, most importantly for many of us, offers a profound benefit for posture by decompressing the spine. It’s not about pulling yourself up; it’s about letting go and letting gravity work its magic.
The Posture Correction 'Secret' Explained
Why is this simple hang so effective for posture? The 'secret' lies in spinal decompression. Throughout the day, gravity, combined with hours of sitting, compresses the vertebrae in your spine. This can lead to stiffness, discomfort, and the dreaded 'tech neck' or forward slouch. When you perform a dead hang, you reverse this effect. Gravity gently pulls your lower body downwards, creating space between the vertebrae. This relieves pressure on the intervertebral discs, allows them to rehydrate, and encourages a more neutral, elongated spinal alignment. Furthermore, the hang provides a deep stretch for your latissimus dorsi ('lats')—the large muscles of your back—and the muscles around your shoulders. Tight lats can pull your shoulders forward, contributing to a rounded upper back. By releasing this tension, you allow your shoulders to sit back in a more natural, open position.
How to Perform the Standard Dead Hang
Mastering the form is key to reaping the benefits safely. Follow these steps: 1. **Find a Secure Bar:** Use a pull-up bar, monkey bars, or any sturdy overhead structure that can comfortably support your full body weight. 2. **Set Your Grip:** Stand below the bar. Reach up and grip it with both hands, using an overhand grip (palms facing away from you). Your hands should be positioned about shoulder-width apart. 3. **Initiate the Hang:** If you can reach the bar from the floor, simply lift your feet. If not, use a stable box or bench to step up. Slowly transfer your weight to your hands and step off the support, keeping a slight bend in your elbows to avoid hyperextension. 4. **Relax and Breathe:** Let your body hang. Relax your shoulders, back, and hips. Avoid shrugging your shoulders up toward your ears; let them move up naturally as your arms extend. Breathe deeply and steadily. Your body should be in a relatively straight line. Aim to hold for 10-30 seconds to start.
Beginner Drills: Starting Safely
If holding your full body weight is too challenging right now, don't worry. You can build up to it with these simple drills: * **Box-Assisted Hang:** Place a box or bench under the bar that's high enough for you to keep your feet on it while hanging. This allows you to support as much of your weight with your legs as needed, progressively increasing the load on your arms and shoulders as you get stronger. * **Active Hangs:** Instead of hanging passively, practice slightly retracting your shoulder blades, pulling them down and back. This 'active' position engages the back muscles more. Alternate between a 5-second passive hang and a 5-second active hang to build shoulder stability. * **Flexed-Arm Hang:** If you can do a pull-up, hold the top position with your chin over the bar for as long as you can. This is an excellent way to build grip and back strength that will translate to a longer dead hang.
Common Mistakes to Avoid
To get the most out of your hangs and prevent injury, steer clear of these common errors: * **Shrugging Your Shoulders:** While your shoulders will naturally elevate, avoid actively shrugging them into your ears. This creates tension rather than releasing it. * **Holding Your Breath:** Always breathe deeply and consistently. Holding your breath can increase blood pressure and prevent your muscles from relaxing into the stretch. * **Swinging:** The goal is a static hold. Avoid any kipping or swinging motions, which can put undue stress on your shoulder joints. * **Jumping Straight into Long Holds:** Start small. Begin with holds of 10-15 seconds and gradually increase the duration as your grip strength improves. Overtraining can lead to elbow or shoulder pain.
Integrating Hangs Into Your Routine
Consistency is more important than duration. You don't need to hang for minutes at a time to see results. A great starting point is to aim for a cumulative hang time of one minute per day. You can break this up into several shorter sets (e.g., three sets of 20 seconds, or six sets of 10 seconds) spread throughout your day or your workout. Dead hangs work perfectly as part of a warm-up to prepare your shoulders for exercise or as a cool-down to decompress your spine after a workout or a long day of sitting. Listen to your body and rest when you need to.