


What Exactly Is Nice Cream?
Nice cream is a clever name for a dairy-free frozen dessert made by blending frozen fruit, most commonly bananas, into a soft-serve consistency. [12] The name comes from it being a “nicer” alternative to traditional ice cream. [1, 3] Because ripe bananas are
naturally sweet and have a dense, creamy texture when frozen and blended, they create a satisfying treat without needing any added sugar, cream, or eggs. [7, 12] It's a game-changer for anyone who is dairy-free, vegan, or simply looking for a healthier way to indulge their sweet tooth. The best part is that it requires minimal ingredients and comes together in minutes. [2, 7]
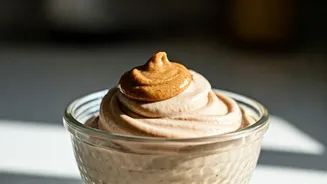
The Key to Creaminess: Your Ingredients
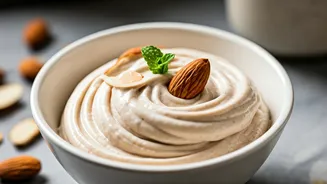
The magic of this recipe lies in its simplicity. For the base, you really only need two things. First, bananas—the riper, the better. Bananas covered in brown spots will lend the most natural sweetness to your nice cream, meaning you won't need to add any other sweeteners. [7, 12] You'll want to peel and slice them before freezing. Second is a creamy, high-quality almond butter, which adds healthy fats, protein, and a rich, nutty flavour. For equipment, a high-speed blender or a food processor is essential to break down the frozen fruit and whip it into a smooth texture. [2, 7] A splash of unsweetened almond milk can also help the blending process if needed, but be careful not to add too much liquid, as it can make the final product runny. [2, 3]
Mastering the Method
The most crucial step is to use bananas that are frozen solid. [3] Plan ahead by peeling, slicing, and freezing your ripe bananas on a baking sheet for at least two to three hours. [3, 7] Freezing them in a single layer prevents them from clumping into a giant block that's impossible to blend. [7] When you're ready, add the frozen banana chunks to your food processor or blender. Blend on high, and be patient. At first, the mixture will look crumbly or like small chunks. [6, 7] Keep blending, scraping down the sides as needed. [1] After a minute or two, it will magically transform into a smooth, airy, soft-serve consistency. [7] Once it's creamy, add your almond butter and a splash of vanilla extract if you like, and blend again briefly until just combined. [4, 13]
How to Serve and Store
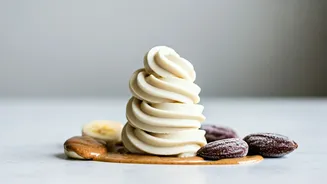
You have two main options for serving. For a soft-serve texture, enjoy it immediately right out of the blender. [2, 7] It will be thick, creamy, and ready to eat. If you prefer a firmer, more traditional scoopable ice cream, transfer the mixture to a loaf pan or freezer-safe container. [1, 2] Freeze for at least two hours. [2] When you're ready to serve, let the container sit at room temperature for about 10-15 minutes to soften slightly, making it easier to scoop. [1] While nice cream is best enjoyed fresh, you can store leftovers in an airtight container in the freezer for up to a week, though it may become icier over time. [7, 11]
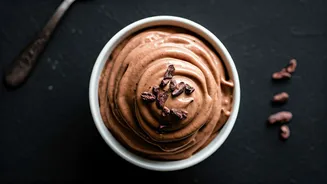
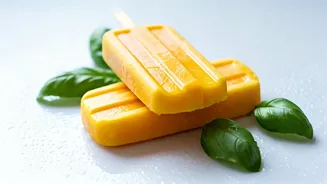
Get Creative with Customisations
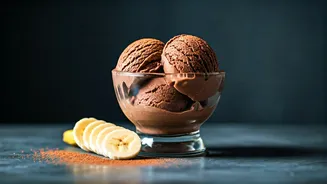
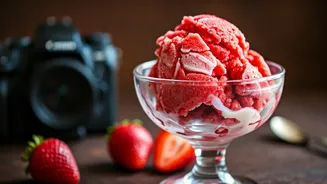
While banana and almond butter is a classic combination, it's also a perfect base for experimentation. For a chocolate version, add a few tablespoons of unsweetened cocoa powder. [8, 10] A pinch of cinnamon or a dash of vanilla extract can add warmth and depth. [14] Feel free to swap the almond butter for peanut butter, pistachio butter, or a seed butter to make it nut-free. [10, 11] For added texture, fold in dairy-free chocolate chips, chopped nuts, or shredded coconut after blending. [4, 8] You can even add other frozen fruits like strawberries or mango for a different flavour profile. [2, 12]