


Why This Project Is Perfect
Before we dive into the 'how,' let's talk about the 'why.' This project is a win on so many levels. First, it’s a fantastic act of upcycling, giving a new lease of life to items that would otherwise end up in a landfill. It’s sustainability in its most
stylish form. Second, it’s incredibly budget-friendly. You’re using materials you already have to create decor that looks chic and modern. Finally, propagating Money Plants (Epipremnum aureum) is one of the easiest and most rewarding gardening activities. These hardy plants, often linked with good fortune and positive energy in Vastu Shastra, thrive in water. Watching new roots sprout from a cutting is a small, magical process that connects you to nature, right from your windowsill or desk.
Gathering Your Simple Supplies
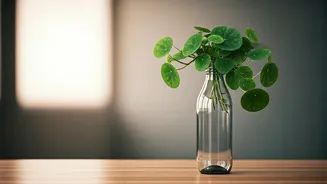
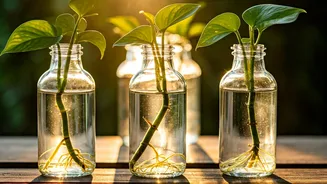
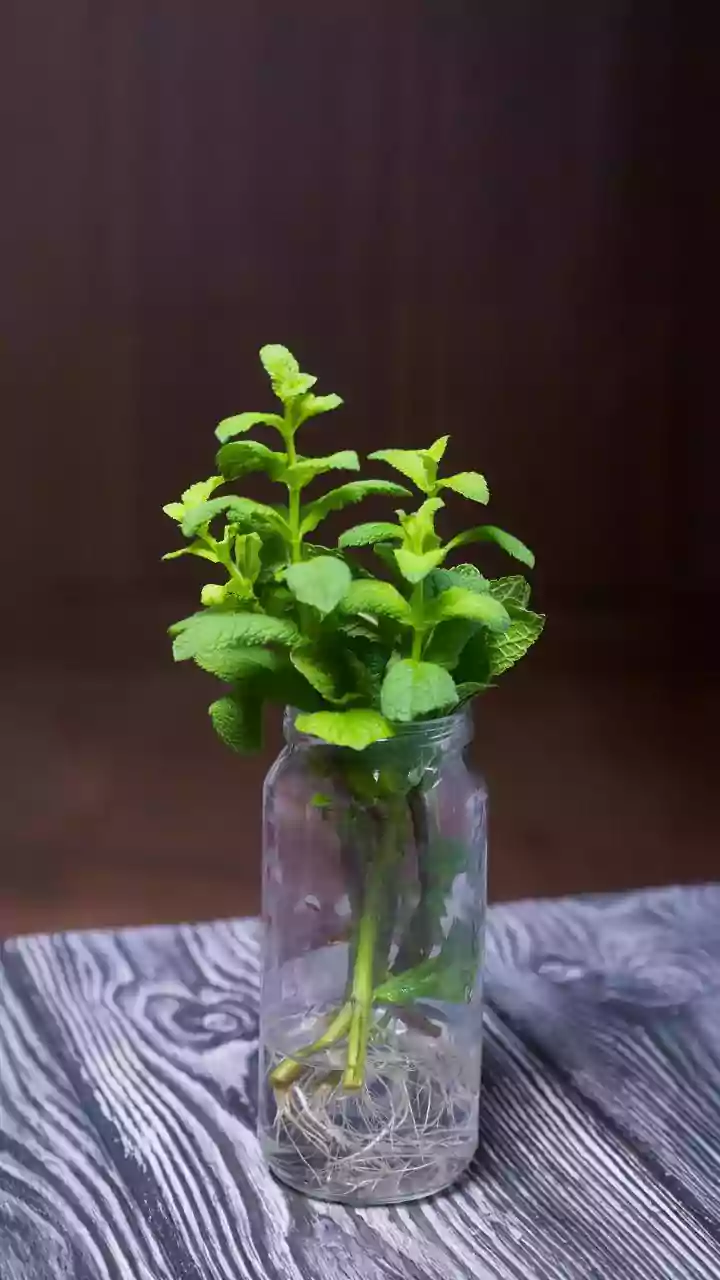
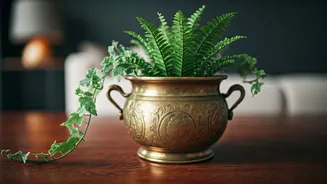
You don't need a trip to a specialty store for this. Most, if not all, of these items are probably already in your home. Here’s your checklist: * **Clear Glass Bottles:** Wine bottles, olive oil bottles, glass soda bottles, or even simple jam jars work wonderfully. The clearer the glass, the better you can see the root growth. * **A Healthy Money Plant:** Look for a lush, established plant from which you can take a few cuttings without harming it. * **Clean, Sharp Scissors or Pruners:** A clean cut is crucial for the health of both the mother plant and the cutting. * **Water:** Regular tap water is usually fine. If your water is heavily chlorinated, let it sit out for 24 hours before using it. * **Soap and a Bottle Brush (Optional):** For cleaning the bottles thoroughly.
Step 1: Preparing Your Bottles
The first step is to get your glass bottles sparkling clean. Any residue from their previous contents can introduce bacteria that may harm your plant cutting. Start by peeling off any labels. Soaking the bottle in warm, soapy water for about 15-20 minutes usually does the trick. If any sticky adhesive remains, a little bit of cooking oil on a cloth can help rub it off. Once the label is gone, use a bottle brush and soapy water to scrub the inside thoroughly. Rinse it well with clean water to ensure no soap is left behind. A clean environment gives your cutting the best possible start, preventing rot and encouraging healthy root development. Let the bottle air dry completely before you proceed.
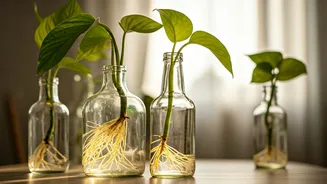
Step 2: Taking the Perfect Cutting
This is the most important part of the propagation process. Select a healthy, vigorous vine from your main Money Plant. Look for a stem that is green and firm, not yellow or mushy. You’ll want a cutting that is about 4-6 inches long and has at least 3-4 leaves. Now, look closely at the stem. You will see small brown bumps or nubs where the leaves meet the stem—these are called nodes. Nodes are where new roots will sprout. Using your sharp, clean scissors, make a cut about an inch below a node. It’s essential to have at least one node on your cutting that will be submerged in water. For a fuller look, you can take a few cuttings. Remove the lowest leaf on the stem, as any leaves left underwater will rot.
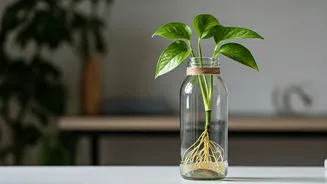
Step 3: Propagation and Ongoing Care
Now for the easiest part. Fill your clean glass bottle with water, leaving an inch or two of space at the top. Gently place your Money Plant cutting into the bottle, ensuring that the node you identified is fully submerged. The leaves should remain above the waterline. Find a bright spot for your new propagation display, but avoid direct, harsh sunlight, which can scorch the leaves and promote algae growth in the water. That’s it! The magic will now begin on its own. To keep the environment healthy, change the water once a week. This replenishes oxygen and prevents the water from becoming stagnant. In about 2-4 weeks, you should start to see delicate white roots emerging from the node. Once the roots are a couple of inches long, you can either transfer the plant to soil or let it continue to grow in the water indefinitely.
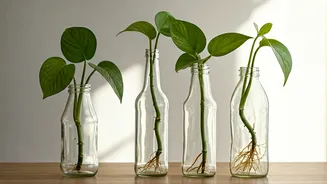
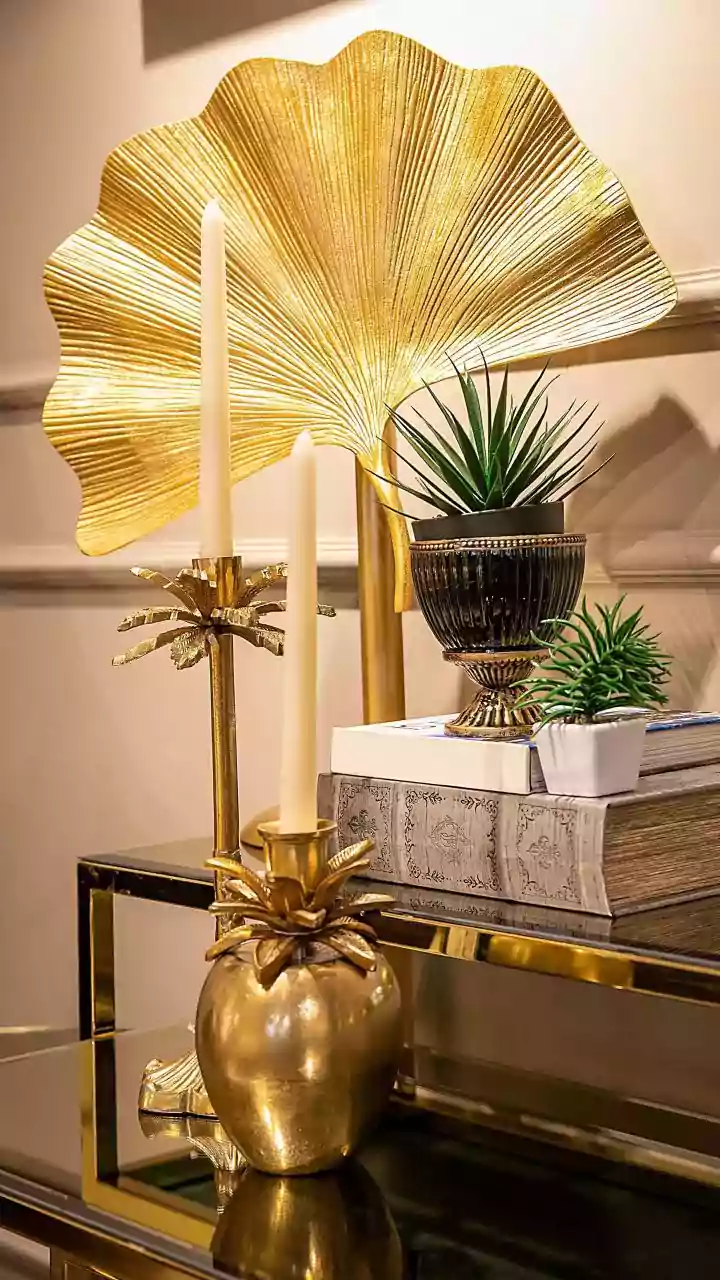
Styling Your New Displays
Once your cuttings are in their new glass homes, it's time to play decorator. A single bottle with a trailing vine on a bookshelf or desk adds a simple, elegant touch of green. You can also create a more impactful display by grouping bottles of different shapes and sizes together on a windowsill or a side table. Play with heights and textures for visual interest. The beauty of these clear glass displays is their minimalism; they let the vibrant green leaves and the fascinating root structures be the stars of the show. As your cuttings grow, they will create a lush, living piece of art that you made yourself.