Spotting the Signs: Does Your Plant Need a New Pot?
Before you get your hands dirty, it’s important to know if your plant actually needs repotting. As a general rule, most houseplants benefit from a new pot every 12 to 18 months, as the soil loses its nutrients over time. However, your plant will also
give you specific clues. One of the most obvious signs is roots poking out of the drainage holes at the bottom of the pot. You might also see them circling around the surface of the soil. Another clear indicator is how quickly the soil dries out. If you're having to water your plant much more frequently than you used to, or the water seems to run straight through, it's a sign that the pot is full of roots with little soil left to hold moisture. Stunted growth is another major clue. If it's the growing season and your plant isn't producing new leaves, or the new leaves are smaller and less impressive than older ones, it may be 'root-bound' and struggling for space and nutrients.
Gather Your Repotting Toolkit
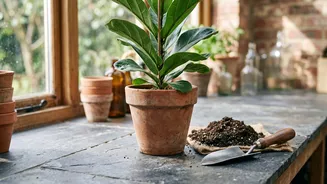
A little preparation makes the whole process smoother. You don't need much, but having the right tools on hand prevents a mid-repotting panic. First, the new pot. Choose a container that is just one to two inches wider in diameter than the current one. It’s tempting to give your plant a mansion, but a pot that's too large can hold excess moisture, leading to root rot. Ensure the new pot has a drainage hole. Next is the potting mix. For most houseplants, a general-purpose, high-quality potting mix is perfect. Avoid using soil from your garden, as it's too heavy and can introduce pests. You might also want a small tarp or some newspaper to work on, a pair of gloves, and pruning shears or scissors for any root trimming. Finally, have your watering can ready for the last step.
The Step-by-Step Guide to Safe Repotting
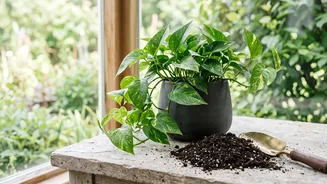
With your supplies ready, it's time to perform the transplant. To remove the plant, turn the pot sideways, hold the plant gently by its main stems, and tap the bottom of the pot to loosen it. If it’s stuck, try gently squeezing the sides of the pot (if it's plastic) or running a dull knife around the inside edge to separate the root ball from the pot. Once the plant is free, inspect the roots. If they are tightly wound in a dense circle — a condition known as being 'root-bound' — you'll need to gently loosen them. Use your fingers to tease the roots apart, especially at the bottom. Don't worry if a few small roots break; the plant can lose up to a third of its roots and still recover well. Place a small layer of fresh potting mix at the bottom of the new pot. Center your plant inside, ensuring the top of the root ball sits about an inch below the rim to leave room for watering. Fill the space around the root ball with fresh potting mix, gently pressing it down to eliminate large air pockets, but don't pack it too tightly.
Aftercare Is Key to Avoiding Shock
The first few weeks after repotting are a recovery period. Your plant has just been through a stressful event, often called 'transplant shock', and needs some gentle care. The first thing to do is give it a thorough watering. This helps settle the new soil around the roots and removes air pockets. Let the excess water drain completely. After this initial soak, place your plant in a spot with bright, indirect light. Avoid direct sunlight for a week or two, as recovering roots can't absorb water fast enough to keep up with the demands of intense light. Hold off on fertilizing for at least four to six weeks. The fresh potting mix has plenty of nutrients, and adding more can burn the sensitive, healing roots. You may notice some slight wilting in the first few days, which is normal. Once you see signs of new growth, you'll know your plant has successfully settled into its new home and you can resume your normal care routine.