



The Science in a Nutshell
Lacto-fermentation is the process we're using here. In short, we create a salty, oxygen-free environment that is perfect for beneficial bacteria called Lactobacillus, which are naturally present on vegetables. These 'good guys' get to work converting
sugars into lactic acid. This acid acts as a natural preservative, creating that signature tangy flavour and, crucially, making the environment too acidic for harmful bacteria to survive. A proper ferment is actually safer than raw vegetables because the process itself eliminates common pathogens.
Your Fermentation Toolkit
You don’t need a lot of fancy equipment to get started. The most important thing is that everything is very clean. For your first ferment, gather these items: A glass jar: A quart-sized Mason jar is perfect for small batches. Avoid reactive metals like copper or iron. Vegetables: Carrots, cabbage, and radishes are great for beginners. Salt: Use non-iodized salt, like sea salt or pickling salt. Iodized table salt can inhibit the good bacteria. Water: If your tap water is heavily chlorinated, it's best to use filtered water. * A weight: You need something to keep the vegetables submerged. A smaller glass jar, a zip-top bag filled with brine, or a specialized glass fermentation weight all work well.
The Golden Ratio: Getting Your Brine Right
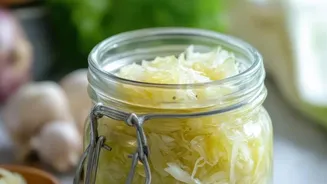
Salt is the gatekeeper of your ferment. It prevents bad bacteria from taking over while the good ones get established. The ideal salt concentration for most vegetables is between 2% and 5%. A 2% brine is a great place to start. To make a 2% brine, you simply dissolve salt in water. The easiest way to do this is by weight: for every 1000 grams (1 litre) of water, add 20 grams of salt. This ratio is reliable and creates a safe environment for your ferment to begin. For shredded vegetables like cabbage for sauerkraut, you can use a 'dry-brining' method, where you massage the 2% salt by weight directly into the cabbage until it releases its own liquid.
Step-by-Step: From Jar to Ferment
1. Prep your vegetables: Wash and chop your vegetables into sticks, rounds, or shreds. 2. Pack the jar: Tightly pack the vegetables into your clean glass jar, leaving about two inches of space at the top. 3. Add the brine: Pour your prepared saltwater brine over the vegetables until they are completely covered. 4. Submerge and weigh down: This is the most important rule. All vegetables must stay below the surface of the brine to keep them away from oxygen. Place your fermentation weight on top to keep everything submerged. The brine should cover the vegetables by at least an inch. 5. Seal it (loosely): Lightly screw on the lid. During fermentation, carbon dioxide is produced, and it needs to escape. If the lid is too tight, pressure can build up. You'll need to 'burp' the jar daily by briefly unscrewing the lid to release gas.
Safety Check: Good Signs vs. Red Flags
During the fermentation process, which can take one to three weeks, you'll notice changes. Bubbling and a cloudy brine are good signs that things are active. However, you must know the difference between normal signs and spoilage. Good Signs: A pleasantly sour or tangy smell. Bubbles rising to the surface. The brine becoming cloudy. Red Flags (Discard Immediately): Fuzzy Mould: Any fuzzy growth that is green, black, blue, pink, or white is a dealbreaker. Do not just scoop it off; the mould may have invisible roots that penetrate the entire batch. Bad Smell: Trust your nose. If it smells rotten, putrid, or just plain repulsive, it's bad. Slimy Texture: If the vegetables become uncharacteristically slimy, this indicates spoilage.
What About a White Film?
You may see a thin, white, wrinkly film on the surface of your brine. This is most likely 'Kahm yeast'. It is not fuzzy like mold and is generally considered harmless, though it can affect the flavour if left to grow. You can carefully skim it off with a clean spoon. The key difference is texture: Kahm yeast is flat and film-like, while mold is fuzzy and three-dimensional. When in doubt about any growth, the safest rule is always: throw it out.
Ready to Eat: Storage and Enjoyment
After about a week, you can start tasting your ferment. When it reaches a level of sourness you enjoy, move the jar to the refrigerator. The cold temperature will dramatically slow down the fermentation process. Your fermented vegetables can last for many months in the fridge. Enjoy them as a side dish, on sandwiches, or as a tangy, probiotic-rich addition to any meal. They are a delicious reward for your patience and a fantastic way to connect with an age-old food tradition.