





Safety and Essential Tools
Before you begin turning bottles into bespoke lighting, it's crucial to prioritize safety. Working with glass and electricity, even at a low voltage, requires care. Always wear safety goggles to protect your eyes from any potential glass splinters, and use
protective gloves, especially if your project involves cutting. A clean, stable workspace is also essential. For more advanced projects, you may need a specialized glass bottle cutter, a diamond drill bit for making clean holes, and sandpaper to smooth any sharp edges. For electrical components, using a pre-assembled bottle lamp kit can simplify the process and ensure a safer connection.
The Effortless Fairy Light Glow
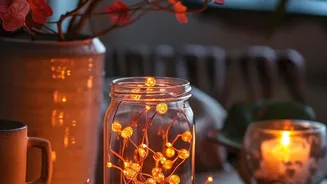
This is the simplest and most popular way to create instant ambiance. All you need is a clean, dry bottle and a string of micro LED fairy lights, which are widely available in battery-operated or USB-powered versions. Choose a bottle with an interesting shape or colour—blue gin bottles or dark green wine bottles work wonderfully. Simply bunch the fairy lights and carefully feed the string into the bottle, leaving the small battery pack or USB plug at the opening. Many modern fairy light sets even come with a cork-shaped stopper that neatly houses the switch and batteries, making it an elegant, all-in-one solution. For an extra touch, you can leave the bottle as is or wrap the outside with twine for a rustic look.
The Classic Table Lamp Conversion
For a more functional and permanent piece, convert a beautiful bottle into a proper table lamp. This project is more involved but yields a professional-looking result. You will need a bottle lamp kit, which typically includes a cord, socket, and a rubber adapter that fits snugly into the bottle's opening. Some methods require you to drill a small hole near the base of the bottle to thread the electrical cord through, which provides a cleaner look. This requires a specific glass or diamond drill bit and patience—drilling slowly while running water over the area can prevent the glass from cracking. Once the cord is in place, you assemble the socket at the top, add a harp, and finish with a lampshade of your choice. The key is to ensure the shade is appropriately proportioned to the bottle base.
The Cut-Bottle Candle Hurricane
If you want to avoid wiring altogether, repurposing a bottle into a candle holder or hurricane lamp is an excellent option. This method requires cutting the bottle, usually separating the top portion from the flat base. A specialized glass bottle cutter is the most reliable tool for this, as it scores a clean line around the circumference. After scoring, a process of applying alternating hot and cold water shocks the glass, causing it to break along the scored line. It is critical to wear safety gear during this process. Once separated, the sharp edges must be thoroughly sanded down until smooth. The bottomless bottle can then be placed over a small pillar candle or a battery-operated LED candle to create a beautiful, protected flame that casts a flickering glow.
The Artistic Painted Finish
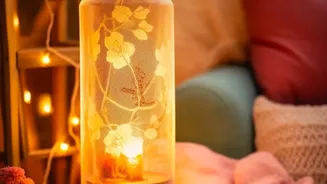
Elevate any bottle lighting project by first treating the glass as a canvas. A bit of paint can completely transform the look and how the light diffuses through it. Frosted glass spray paint gives bottles an ethereal, sea-glass effect with just a light coating. For a more artistic approach, use acrylic paints suitable for glass to create patterns, landscapes, or abstract designs on the outside of the bottle. You can even use stencils to apply intricate patterns or quotes. Another technique is decoupage, where you apply torn paper or fabric to the exterior with a sealant like Mod Podge, creating a textured, mosaic-like appearance when lit from within. These decorative finishes add a layer of personality, turning a simple light source into a true piece of art.