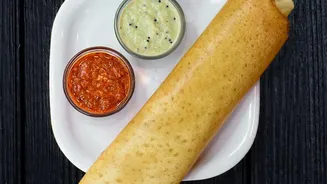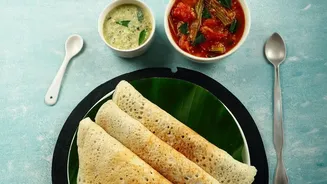





Oats dosa offers a healthy, delicious, and quick alternative to the traditional version, ready in under 30 minutes. But achieving that perfect, paper-thin, crispy texture can be a challenge. This guide will walk you through the essential techniques.
The Foundation: A Perfect Batter
The
secret to a crispy, lacy oats dosa lies in the batter's consistency. Unlike the thick batter of a regular dosa, an instant oats dosa batter needs to be thin and free-flowing, almost like buttermilk or light cream. Most recipes create a powerful trio of flours: powdered oats for body and fibre, rice flour for crispiness and binding, and a small amount of rava (sooji or semolina) for that signature crunch. To begin, dry roast rolled or quick-cooking oats for a few minutes until fragrant, then grind them into a fine powder. Combine this oat flour with rice flour, rava, and seasonings like salt and cumin seeds. Whisk in curd or yoghurt for a slight tang that mimics fermentation, then gradually add water until you reach the desired runny consistency. It's also common to add finely chopped onions, green chillies, ginger, and coriander for flavour.
The 15-Minute Rest Is Crucial
Once your batter is mixed, don't rush to the stove. Letting the batter rest for at least 10 to 20 minutes is a non-negotiable step. This allows the oats and rava to absorb the water and swell, which is essential for the dosa's structure and prevents it from breaking apart on the tawa. If you skip this rest, you'll likely end up with a dosa that falls apart. During this time, the batter will naturally thicken. Before making each dosa, you'll need to give the batter a good stir, as the solids tend to settle at the bottom, and you may need to add a few more tablespoons of water to return it to its original thin consistency.
Mastering Tawa Temperature
The temperature of your tawa, whether cast iron or non-stick, is just as important as the batter. The tawa must be properly hot before you pour. A common way to check is to sprinkle a few drops of water on the surface; they should sizzle and evaporate almost instantly. If the tawa is not hot enough, the batter will stick and result in a pale, soft dosa. If it's too hot, the dosa might burn before it cooks through. For a cast-iron tawa, seasoning is key. Rubbing the hot surface with a cut onion dipped in oil not only imparts a nice flavour but also creates a temporary nonstick layer. A light wipe of oil is sufficient; too much oil can cause the batter to slide instead of spreading.
The Art of the Pour
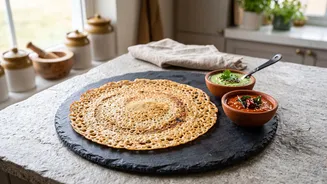
Making a thin oats dosa does not involve spreading the batter with the back of a ladle like a traditional dosa. Instead, the technique is all about pouring. After stirring your thin batter, take a ladleful and pour it from a height, starting from the outer edge of the tawa and moving towards the centre in a circular motion. The thin batter will naturally spread and create a lacy, weblike pattern. Fill in any large gaps by pouring a little more batter, but avoid trying to spread it with a utensil. Drizzle a teaspoon of oil or ghee around the edges and in the gaps to help it crisp up.
Troubleshooting Common Issues
Even with the right steps, things can go wrong. Here's how to fix common problems:
Why is my dosa sticking? The tawa was likely not hot enough when you poured the batter, or if using cast iron, it may not be seasoned well. Ensure the pan is sizzling hot and lightly greased.
Why isn't it crispy? This is usually due to a batter that is too thick, a tawa that is not hot enough, or cooking on a low flame for too long. The batter should be watery. Another tip for maximum crispness is to cook the dosa only on one side; flipping it can make it soft.
Why is my dosa breaking? If the batter is too thin and watery, the dosa might lack the structure to hold together. If this happens, try adding a tablespoon or two of rice flour to the batter to give it more binding power. Conversely, a batter that didn't rest long enough will also break.