





Understanding the Temperature 'Danger Zone'
The most critical concept in food safety is the 'Danger Zone'. According to food safety agencies like the U.S. Department of Agriculture (USDA), this is the temperature range between 40°F (about 4.4°C) and 140°F (60°C). Within this zone, harmful bacteria
such as Salmonella and E. coli can multiply rapidly, sometimes doubling in number in as little as 20 minutes. Any perishable food left in this temperature range for more than two hours is considered unsafe to eat. If the ambient temperature is high, such as above 90°F (32°C), this window shrinks to just one hour. The goal is to keep cold foods cold (at or below 40°F) and hot foods hot (at or above 140°F).
Know Your High-Risk Foods
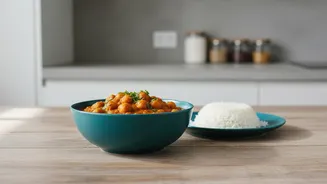
Certain foods are more susceptible to bacterial growth and are considered 'high-risk'. These items require diligent temperature control. Common examples include raw or cooked meat, poultry, and seafood. Dairy products like milk, cream, custards, and soft cheeses also fall into this category. Be extra cautious with foods containing eggs, such as mayonnaise or quiche, as well as prepared salads like coleslaw, potato salad, and pasta salads. Even cooked rice and pasta can pose a risk if not kept at a safe temperature. Any ready-to-eat foods that contain these ingredients, such as sandwiches or sushi, must be kept properly chilled.
The Essential Toolkit for Safe Transport
Having the right gear is the first step to success. An insulated cooler is non-negotiable. For best results, pre-chill your cooler overnight by placing a bag of ice or frozen water bottles inside. This ensures the cooler itself doesn't warm up your food. Your cooling source is just as important. A combination of block ice and ice packs is often ideal. Block ice melts slower, providing long-lasting cold, while loose cubes or packs can fill in the gaps. Consider freezing water bottles to act as ice blocks—they won't leak water into the cooler as they thaw. Finally, a small refrigerator thermometer can be a powerful tool. Place it inside the cooler to monitor the internal temperature and ensure it stays at or below 40°F.
How to Pack a Cooler Like a Pro
Strategic packing makes all the difference. Start by placing a layer of ice packs or a block of ice at the bottom. The next layer should be your raw meats and poultry, which should be in sealed, watertight containers to prevent any juices from contaminating other foods. It's safest to keep raw meats at the very bottom. Pack other items in reverse order of use, with things you'll need last at the bottom and snacks for the journey on top. Fill any empty spaces with more ice, as air pockets cause ice to melt faster. It's also wise to have a separate cooler for drinks, as this one will be opened more frequently, causing the temperature to fluctuate.
Common Mistakes to Avoid
A few common errors can undermine your best efforts. First, don't pack your cooler in advance and leave it sitting. Load food directly from your refrigerator into the pre-chilled cooler just before you leave. Second, avoid cross-contamination at all costs. Always keep raw meats separate from ready-to-eat foods, and use separate, sealed containers for everything. Third, resist the urge to constantly open the cooler lid. Every time you do, cold air escapes and warm air enters. Finally, once you arrive at your destination, move the cooler into the shade. If you're at a beach, you can even partially bury it in the sand and cover it with a blanket to help it stay cool.