


Why Hip Opening Matters So Much
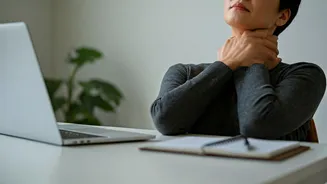
After days of immersive yoga, you might feel more flexible and free than ever. But once you return to daily life—sitting at a desk, driving in traffic, or even just dealing with stress—your hips are often the first place tension decides to settle. Modern
lifestyles contribute heavily to tight hip flexors, which can lead to a cascade of issues, including lower back pain, poor posture, and restricted movement. On a more subtle level, yoga philosophy considers the hips a storage area for stress and negative emotions like fear and sadness. Working on hip-opening poses isn't just about gaining physical flexibility; it's a practice of release. By gently encouraging this area to open, you can improve circulation, increase your range of motion, and create space for emotional release, helping you maintain that sense of balance and well-being you cultivated at the festival.
Baddha Konasana (Butterfly Pose)
This foundational seated pose is a gentle yet profound way to open the inner thighs and groin. It’s an excellent starting point for any hip-opening sequence.
How to do it: Sit on the floor with your legs extended. Bring the soles of your feet together, letting your knees fall out to the sides. Hold onto your feet or ankles and sit up tall, lengthening your spine. To deepen the stretch, you can gently press your knees toward the floor or fold forward from your hips, keeping your back straight. Hold for 5-10 deep breaths.
Pro-Tip: If your knees are high off the ground, place yoga blocks or cushions under each one for support. This allows your muscles to relax into the stretch rather than tensing up.
Anjaneyasana (Low Lunge)
A low lunge is perfect for targeting the hip flexors, the group of muscles at the front of your hip that get notoriously tight from sitting.
How to do it: From a tabletop position, step your right foot forward between your hands. Slide your left knee back until you feel a comfortable stretch in the front of your left thigh and hip. Ensure your right knee is stacked directly over your right ankle. You can keep your hands on the floor, on your front knee, or raise them overhead for a deeper stretch and a gentle backbend. Breathe into the stretch for 30 seconds before switching sides.
Pro-Tip: Place a folded blanket under your back knee for extra cushioning and comfort, allowing you to hold the pose longer.
Malasana (Garland Pose or Yogi Squat)
This deep squat is a natural human position that has incredible benefits for hip mobility, digestion, and strengthening the pelvic floor.
How to do it: Stand with your feet slightly wider than your hips, with your toes pointing slightly outwards. Slowly bend your knees and lower your hips towards the floor into a deep squat. If your heels lift, it’s perfectly fine. Bring your palms together at your heart centre and use your elbows to gently press your knees apart, deepening the stretch in your hips. Keep your spine long and your chest lifted. Hold for 5-8 breaths.
Pro-Tip: If your heels don't touch the ground, slide a rolled-up towel or a yoga block under them for support. This provides stability and helps you access the benefits of the pose more comfortably.
Gomukhasana (Cow Face Pose) Legs
While the full pose involves a complex arm bind, focusing on just the legs provides one of the most intense and effective stretches for the outer hips and glutes.
How to do it: Sit on the floor and cross your right leg over your left, stacking your right knee directly on top of your left knee. Your feet should be on either side of your hips. Try to sit evenly on both sit bones; you may need to sit on a block or cushion to achieve this. You should feel a deep stretch in your right hip and glute. Stay here, breathing deeply, or fold forward for a more intense sensation. Hold for 30-60 seconds, then mindfully uncross your legs and repeat on the other side.
Pro-Tip: If stacking the knees is too intense, start with a simpler cross-legged position (Sukhasana) and gently fold forward.