





Start with Your Chair Height
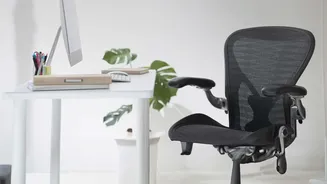
The foundation of a pain-free setup starts from the ground up. Before touching anything else, adjust your chair's height. The goal is to have your feet resting flat on the floor with your thighs parallel to it. Your knees should be at or slightly below
the level of your hips, forming a 90-degree angle or slightly wider. If your feet dangle after adjusting your chair to the right desk height, don't lower the chair. Instead, use a footrest or a sturdy stack of books to bring the floor up to your feet. This position keeps your pelvis stable and prevents it from rolling backward, which is a common cause of slouching and lower back strain.
Set Your Seat Depth and Back Support
Once your height is set, ensure you are using the full seat. Sit back so that your buttocks touch the back of the chair. There should be a small gap, about two to three fingers' width, between the front edge of your seat and the back of your knees. This ensures your thighs are properly supported without cutting off circulation. Most importantly, your chair must support the natural S-curve of your spine. Engage the lumbar support so it fits snugly into the curve of your lower back. If your chair lacks adjustable support, a small rolled-up towel or a dedicated lumbar pillow can serve the same purpose, preventing you from flattening your lower back and straining the spinal discs.
Align Your Armrests and Shoulders
Armrests are not just for resting; they play a crucial role in reducing strain on your neck, shoulders, and upper back, which can indirectly affect your lower back by influencing your overall posture. Adjust the armrests so that your shoulders are relaxed and your elbows are bent at a roughly 90-degree angle when your hands are on the keyboard. Your forearms should be parallel to the floor. If the armrests are too high, they will force you to shrug your shoulders; too low, and you'll lean to one side, creating an imbalance that travels down your spine.
Position Your Monitor at Eye Level
Now, turn your attention to the screen. A poorly positioned monitor is a primary cause of the forward-hunching posture that puts immense strain on both the neck and the lower back. The rule of thumb is simple: the top of your monitor should be at or slightly below your eye level when you are sitting up straight. This allows your eyes to look slightly downward to view the center of the screen, which is a more natural and relaxed gaze. If you work on a laptop, you are almost guaranteed to be looking down and hunching. To fix this, use a laptop stand or a stack of books to elevate the screen and use a separate keyboard and mouse.
Check Monitor Distance and Angle
Getting the height right is only half the battle. Your monitor should also be positioned at a comfortable viewing distance, typically about an arm's length away. If you have to lean forward or squint to read text, the screen is too far. If it feels overwhelming, it may be too close. Once positioned, tilt the monitor back slightly, around 10 to 20 degrees. This helps to reduce glare and aligns the screen with your natural downward line of sight, further preventing the need to crane your neck forward or backward.
Incorporate Movement and Good Habits
Even the most perfect ergonomic setup cannot defeat the negative effects of being static for too long. Your body is designed to move. Set a timer to remind yourself to stand up, stretch, and walk around for a few minutes every 30 to 60 minutes. This promotes circulation, reduces muscle stiffness, and gives your spinal discs a break. Also, be mindful of habits like crossing your legs, which can tilt your pelvis and create imbalances in your lower back and hips. By combining a well-adjusted workspace with regular movement, you give yourself the best defense against desk-related back pain.