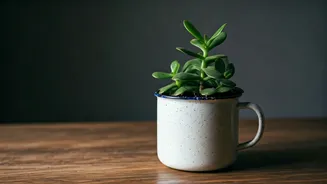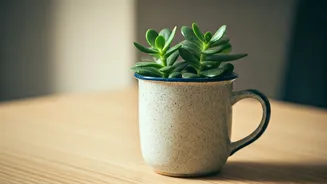


Why Mugs Make Great Planters
An unused ceramic mug is the ideal size for a small desk plant. It's sturdy, readily available, and often free if you're just recycling one from the back of your cupboard. The thick ceramic walls also help insulate the plant's roots from sudden temperature
changes, which can be common in an office environment. Plus, using a mug with a fun design or a sentimental message adds a personal touch to your workspace that a generic plastic pot simply can't match. This upcycling project is not just cost-effective; it’s a sustainable choice that gives an old item a new, vibrant purpose. The key, however, lies in properly preparing the mug to become a healthy home for a plant, especially a succulent like jade that despises wet feet.
The Crucial Detail: Drainage
Here's the most important thing to know: Jade plants, like most succulents, are highly susceptible to root rot if they sit in waterlogged soil. Standard ceramic mugs have no drainage holes, which is a major problem for plant health. You have two ways to address this. The best and most recommended method is to create a drainage hole yourself. This ensures excess water can escape, protecting the roots. The second, less ideal method involves creating an internal drainage layer. While possible, this requires extremely careful watering and carries a higher risk of failure. We'll cover both, but drilling a hole is strongly advised for the long-term health of your plant.
Option 1: Drilling a Drainage Hole
This might sound intimidating, but it’s quite manageable with the right tool. You will need a power drill and a special drill bit designed for ceramic or tile (a diamond-tipped or carbide-tipped masonry bit works best). Start by placing a piece of masking tape on the bottom of the mug where you want to drill; this will prevent the drill bit from slipping. Begin drilling slowly and at a low speed, applying gentle, steady pressure. Do not force it. To prevent overheating and cracking, it's a good idea to periodically spray a little water on the drilling area. Within a minute or two, you should have a clean hole. Now your mug is a proper planter, ready for soil.
Option 2: The No-Drill Method
If drilling isn't an option, you can try to create a false drainage layer. Place a one-inch layer of small pebbles, gravel, or LECA (lightweight expanded clay aggregate) at the bottom of the mug. On top of this, add a thin layer of activated charcoal (available at pet stores or garden centres). The charcoal helps absorb impurities and combat potential rot and odours from stagnant water. The idea is that any excess water will collect in the pebble layer, away from the soil and roots. However, if you overwater even slightly, the water level can rise and saturate the soil anyway. If you choose this method, you must be vigilant and water very sparingly.
Planting and Soil Selection
Once your mug is prepared, it’s time to plant. For a jade plant, you must use a fast-draining soil mix. Do not use standard potting soil or garden soil, as it retains too much moisture. Look for a commercial cactus or succulent potting mix. Alternatively, you can make your own by mixing two parts standard potting soil with one part perlite and one part coarse sand. Gently remove your small jade plant or cutting from its original container, loosen the root ball slightly, and place it in the mug. Fill the surrounding space with your soil mix, leaving a little room at the top for watering. Pat the soil down gently to secure the plant.
Desk Placement and Care
Jade plants thrive in bright, indirect light. An east-facing window is perfect, but a spot on your desk a few feet away from a south- or west-facing window also works well. Direct, harsh sunlight can scorch their leaves. The golden rule of watering a jade plant, especially in a small container like a mug, is: when in doubt, don't. Allow the soil to dry out completely between waterings. You can check by sticking a finger or a wooden skewer an inch into the soil. If it comes out dry, it's time to water. Water thoroughly until it runs out of the drainage hole (if you drilled one). If you used the no-drill method, add water in very small amounts—just a few tablespoons at a time.