




Beyond Sprouts: What Are Microgreens?
Before you can grow them, it helps to know what they are. Microgreens are not to be confused with sprouts, which are germinated seeds eaten whole—root, seed, and shoot—after just a few days of growth. Instead, microgreens are young vegetable greens harvested
after the first set of true leaves appear, typically within 7 to 21 days. You eat the stem and leaves, which are cut above the soil or growing mat. This distinction is key; microgreens are grown in a medium and require light, developing a more complex flavour and nutritional profile than sprouts. Think of them as the toddler stage of a plant—past the infancy of a sprout, but not yet a fully grown vegetable.
Concentrated Nutrition in Every Bite
Their tiny size is deceptive. Microgreens are nutritional powerhouses, packing a higher concentration of vitamins and minerals than their mature counterparts. Studies have shown that microgreens can contain significantly higher levels of nutrients like vitamins C, E, and K, as well as antioxidants. For instance, red cabbage microgreens can have many times the Vitamin C of mature red cabbage. This nutritional density means that even a small garnish can contribute a meaningful amount of potassium, iron, zinc, and magnesium to your diet. Adding a handful of fresh broccoli microgreens to a salad or sandwich is an effortless way to boost your intake of beneficial plant compounds that support overall health.
The Newest Accent in Kitchen Decor
The days of hiding your indoor gardening projects are over. Today’s microgreen harvesting setups are designed to be seen. Gone are the purely functional plastic trays, replaced by elegant systems that complement modern kitchen aesthetics. Companies now offer sleek, self-watering kits made from ceramic, bamboo, or stainless steel. Many setups are compact enough to fit on the narrowest of windowsills, transforming a previously unused space into a lush, edible garden. Some high-end models even come with integrated, full-spectrum LED grow lights, ensuring a successful harvest even in kitchens with limited natural light. These kits function as living decor, adding a vibrant splash of green and a touch of organic beauty to your countertop.
Your First Windowsill Harvest in Days
Getting started with microgreens is surprisingly simple and requires minimal investment. You need four basic things: a shallow container with drainage, a growing medium, quality seeds, and a light source. For beginners, a pre-packaged kit is an excellent way to start, as it provides everything you need. Alternatively, you can create your own setup. Fill a shallow tray with an inch or two of potting soil or a soil-less medium like coconut coir. Sprinkle your chosen seeds evenly across the surface, pressing them gently into the medium. Mist thoroughly with water and cover the tray to maintain humidity. After a few days, once seeds germinate, uncover the tray and place it in a sunny spot. Continue to mist daily, and within one to two weeks, you’ll be ready to harvest your first crop by snipping the greens just above the soil line.
Easy Varieties to Get You Started
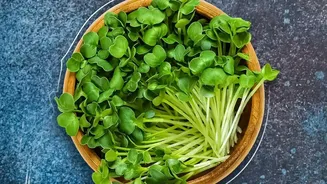
Not all microgreens are created equal when it comes to ease of growth. For your first foray, it’s best to choose varieties that are known to be forgiving and fast-growing. Radish microgreens are a popular choice for their spicy flavour and rapid growth, often ready in just over a week. Broccoli is another favourite, prized for its mild taste and high nutritional value. Pea shoots are wonderfully sweet and crunchy, making them a hit with kids and adults alike. Other reliable options for beginners include mustard for a zesty kick, and clover for a fresh, clean flavour. Starting with these varieties will build your confidence and give you a quick, rewarding harvest, encouraging you to explore more exotic greens in the future.