





The Foundation of Strength
Often overlooked, the wall push-up is a foundational movement that builds strength safely. By using a wall instead of the floor, you reduce the load on your joints, particularly the wrists and shoulders, making it an excellent starting point for those
new to fitness or recovering from injury. It targets the same primary muscles as a traditional push-up—the chest (pectorals), shoulders (deltoids), and triceps—but in a more controlled environment. This allows you to focus purely on form, creating the muscle memory needed to progress to more challenging variations like incline or floor push-ups.
Why a Straight Line Is Non-Negotiable
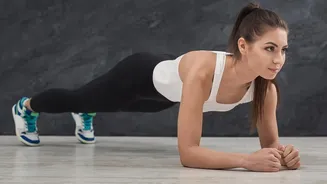
Imagine your body is a solid plank, moving as one single unit from your head to your heels. This is the goal. Proper alignment ensures that the right muscles are doing the work. When your body is straight, your chest, shoulders, and arms are the prime movers, while your core muscles—including your abdominals and lower back—work hard to stabilize your entire torso. This full-body engagement not only strengthens the upper body but also significantly improves core stability, which is vital for good posture and preventing injury in everyday activities.
Common Alignment Mistakes to Avoid
The effectiveness of a wall push-up craters when alignment breaks down. The most common error is sagging hips, where the lower back arches and the pelvis drops toward the wall. This disengages the core and puts unnecessary stress on the lower spine. Another frequent mistake is letting the head jut forward, which strains the neck muscles. Also, watch for elbows flaring straight out to the sides, forming a 'T' shape with your body. This can put undue stress on the shoulder joints. Instead, your elbows should track back at roughly a 45-degree angle.
A Step-by-Step Guide to Perfect Form
To perform a wall push-up correctly, start by standing about an arm's length away from a solid wall. Place your hands on the wall slightly wider than your shoulders, at shoulder or chest height. Before you begin the movement, brace your core as if preparing for a plank, and squeeze your glutes. This creates the rigid line you need to maintain. Slowly bend your elbows to lower your chest toward the wall, keeping your body straight from head to heels. Your shoulder blades should naturally come together as you lower. Pause for a moment when your nose or chest is close to the wall, then exhale as you press firmly back to the starting position, moving your entire body as one unit.
Feeling the Movement, Not Just Doing It
Focus on slow, controlled movements rather than rushing through repetitions. Quality over quantity is key. Pay attention to the muscles you feel working. You should feel tension in your chest and the backs of your arms as you push away from the wall, and your core should feel engaged throughout. This mind-muscle connection is crucial for building strength and body awareness. If you find your form breaking down—for example, your hips sagging—it's better to end the set and rest than to continue with improper technique. Filming yourself from the side can be a great way to check your alignment.
How to Progress Safely
Once you can comfortably perform multiple sets of 12-15 repetitions with perfect form, you can increase the challenge. The simplest way to progress is to step your feet further back from the wall. This increases the angle of your body and forces your muscles to support more of your body weight. From there, you can move to incline push-ups on a sturdy countertop or bench, gradually working your way to the floor. This systematic progression ensures you build strength without skipping crucial steps, setting you up for long-term success and injury-free training.