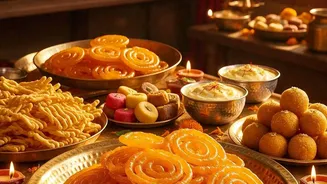





The aroma of freshly fried gujiya is the scent of Diwali. These sweet, crescent-shaped pastries can seem daunting to make, but achieving that perfect crisp shell and leak-proof seal is entirely possible in your own kitchen.
Mastering the Sweet Filling
The heart of a great gujiya
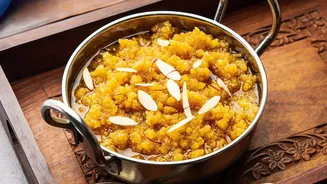
is its filling, a fragrant mixture that balances sweetness and texture. The most traditional filling is made with khoya (mawa), which are dried evaporated milk solids. To prepare it, you simply need to sauté grated khoya in a pan over low heat until it turns a light golden brown and releases its aroma. Once cooled, this forms the rich, creamy base. To this, you add fine semolina (sooji), lightly roasted in ghee until fragrant, which provides a lovely granular texture. The sweetness comes from powdered sugar or boora, which should only be mixed in after the khoya and sooji mixture has cooled down completely to prevent it from becoming watery. Finally, a blend of chopped nuts like almonds, pistachios, and cashews, along with desiccated coconut and a hint of cardamom powder, completes the filling. Make sure the filling is completely cool before you start stuffing the gujiyas, as warm filling can create moisture and tear the dough.
The Secret to a Crisp Shell
The difference between a good gujiya and a great one lies in the crispness of its shell. This is achieved by getting the dough just right. The key ingredient is 'moyan', which is the fat you add to the all-purpose flour (maida). For a truly crisp and flaky crust, using ghee is highly recommended. The ratio is crucial: a general rule is to use about one-quarter cup of melted ghee for every two cups of flour. Rub the ghee into the flour with your fingertips until the mixture resembles breadcrumbs. When you press a small amount in your fist, it should hold its shape. This step ensures the pastry becomes 'khasta' or short. Once the moyan is incorporated, you need to knead a firm, stiff dough using a small amount of water or milk. A soft, pliable dough like one for rotis will result in soft gujiyas that bubble up and won't stay crisp. After kneading, cover the dough with a damp cloth and let it rest for at least 30 minutes. This allows the gluten to relax, making it easier to roll.
The Art of Folding and Sealing
A perfectly sealed gujiya is a mark of pride, ensuring the delicious filling stays inside during frying. First, roll out a small ball of dough into a thin, even circle about 4-5 inches in diameter. Don't make it too thin, or it might tear. Place a spoonful of the cooled filling onto one half of the circle, leaving a clear border of about half an inch around the edge. Be careful not to overfill, as this is the most common reason for gujiyas bursting open. Dip your finger in water and apply it along the entire edge of the circle. This acts as a glue. Carefully fold the other half over the filling to create a semi-circle, pressing the edges firmly to seal them. Now comes the decorative part. You can either use a gujiya mould, which clamps down to seal and trim the edge, or you can do it by hand. To create the traditional braided edge ('godhna'), pinch and twist the sealed edge inwards, creating a beautiful, rope-like pattern. This not only looks good but also creates a stronger seal.
Frying for a Flawless Golden Finish
How you fry the gujiya is the final test. The secret to a smooth, evenly browned, and non-bubbly crust is frying on low heat. Heat ghee or oil in a deep kadai over a medium flame, then reduce the heat to low. To test if it's ready, drop a tiny piece of dough into the oil; it should sizzle gently and rise to the surface slowly. If it rises too quickly, the oil is too hot. Gently slide a few gujiyas into the oil, making sure not to overcrowd the pan. Frying them on consistently low heat allows the pastry to cook through and become crisp from the inside out. High heat will cook the outside too quickly, leaving the inside raw and creating unsightly air bubbles on the surface. Fry the gujiyas for about 8–10 minutes, flipping them occasionally, until they are a uniform pale golden colour. Then, you can briefly increase the heat to medium for any last minute to achieve that perfect golden–brown hue. Remove them with a slotted spoon and place them on a wire rack or paper towel to drain any excess oil.