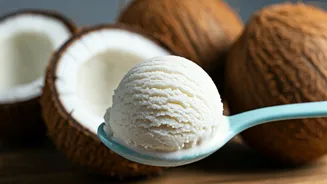


The Irresistible Charm of Tender Coconut
There's a reason tender coconut, or nariyal, holds a special place in our hearts. Its delicate, refreshing flavour is the taste of summer, nostalgia, and simple pleasures. Unlike store-bought versions that often rely on artificial flavours, making it
at home lets the fresh, authentic taste of tender coconut shine. This no-churn method is a game-changer, achieving a luxuriously creamy texture without any special equipment. The magic lies in using high-quality, fresh ingredients to capture that beloved flavour, reminiscent of the famous scoops from Natural Ice Cream. This recipe is all about bringing that clean, mildly sweet, and utterly satisfying experience into your own kitchen with minimal effort.
The 'No-Churn' Secret Explained
So, how does no-churn ice cream achieve its creamy dreaminess without the constant churning of a machine? The secret lies in a two-part harmony. First, sweetened condensed milk provides the sugar and milk solids needed for a rich base. Its high sugar content is crucial as it lowers the freezing point, which helps prevent the formation of large, crunchy ice crystals. Second, whipped cream is folded into the base. Whipping incorporates air into the cream, making it light and fluffy. This aeration mimics the effect of churning, giving the final product a smooth, scoopable texture instead of a solid, icy block. This clever combination ensures your homemade ice cream is perfectly creamy straight from the freezer.
Your Simple Ingredient Checklist
The beauty of this recipe is its simplicity, which starts with the ingredients. You only need a few key items to create this tropical delight. - Tender Coconut Meat (Malai): 1 cup, from about 2-3 fresh tender coconuts. Ensure it’s the soft, fleshy kind. This is the star of the show, so fresher is better. - Sweetened Condensed Milk: 1 can (approx. 400g). This is the base for sweetness and creaminess. - Heavy Whipping Cream: 2 cups, chilled. The fat content (at least 36%) is essential for whipping to stiff peaks. - Fresh Tender Coconut Water: ½ cup, for blending the coconut meat into a smooth paste. - Optional: Extra tender coconut pieces, finely chopped, to fold in for texture. A pinch of cardamom can also add a lovely aroma.
Step-by-Step to Creamy Perfection
1. Prepare the Coconut Base: In a blender, combine the 1 cup of tender coconut meat with the ½ cup of coconut water. Blend until you have a completely smooth, creamy paste. Set this aside. 2. Whip the Cream: Pour the chilled heavy cream into a large, cold mixing bowl. Using an electric mixer or a stand mixer with a whisk attachment, whip the cream until stiff peaks form. This means when you lift the beaters, the cream stands up straight without flopping over. Be careful not to overwhip, or you’ll start making butter. 3. Combine the Ingredients: Gently pour the sweetened condensed milk into the whipped cream. Add the prepared coconut paste as well. Using a spatula, carefully fold the ingredients together until just combined. The goal is to keep the mixture as light and airy as possible. 4. Add Texture: If you like having little bites of coconut in your ice cream, now is the time to fold in your extra finely chopped tender coconut pieces. 5. Freeze: Pour the mixture into a freezer-safe container, like a loaf pan. Press a piece of plastic wrap or parchment paper directly onto the surface of the ice cream to prevent ice crystals from forming. Cover the container and freeze for at least 6-8 hours, or overnight, until firm.
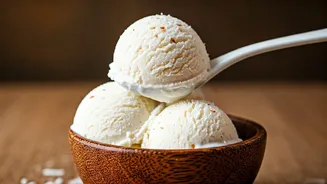
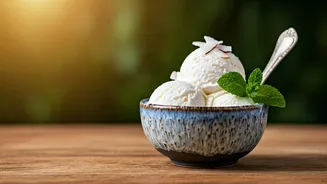
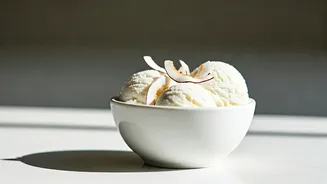
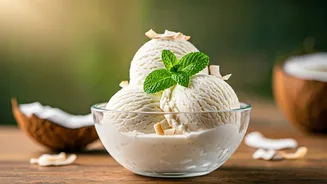
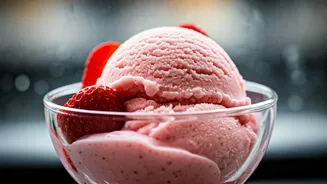
Style Your Scoop for the Perfect Shot
Ready to make your dessert feed famous? Presentation is everything. First, choose your vessel wisely. Serving the ice cream in a natural coconut shell gives an immediate tropical vibe. Alternatively, a chilled glass or ceramic bowl works beautifully. Before scooping, let the ice cream sit at room temperature for 5-10 minutes to soften slightly. For perfect scoops, use a metal scooper dipped in hot water. Now for the fun part: garnishes. Sprinkle with toasted coconut flakes for a nutty aroma and golden colour. Fresh mint leaves add a pop of green. For texture, consider adding crumbled vanilla wafers or chopped nuts. When taking a photo, natural light is your best friend. Position your masterpiece near a window. A clean, simple background will make your creation stand out. Don't be afraid of a little melt; a slight drip down the side can make the shot look even more delicious and inviting.