







Why Waterlogging Is a Microbial Crisis
Healthy soil is teeming with life, most of it microscopic. Beneficial bacteria and fungi, known as aerobic microbes, need oxygen to survive. When your garden plot or container is saturated with water, these air pockets disappear. The beneficial microbes die
off, and anaerobic (non-oxygen-loving) microbes, some of which can be harmful to plants, begin to take over. This shift disrupts the entire soil ecosystem, halting the natural processes that break down organic matter and make nutrients available to your plants. Essentially, the life-support system for your plants shuts down.
Step 1: Wait and Assess
Before you rush in to fix things, give the soil a chance to drain naturally. The biggest mistake gardeners make is working with soil when it is still saturated. Walking on or tilling wet soil, especially heavy clay types common in many Indian regions, will compact it further. Compaction squeezes out the few remaining air pockets, making a bad situation much worse. Check the soil by taking a small handful and squeezing. If water drips out, it is too wet to work. Wait until it is just damp and crumbly to the touch before proceeding with any recovery efforts.
Step 2: Gently Improve Aeration
Once the soil is no longer dripping wet, the immediate goal is to reintroduce oxygen. For container gardens, ensure drainage holes are clear and not blocked. You can gently tilt the pot to help excess water run out. For garden plots, avoid deep tilling which can destroy soil structure. Instead, use a garden fork to gently poke holes into the top few inches of the soil. This process, known as aeration, creates channels for air and water to penetrate without causing major disturbance to the delicate, recovering soil food web.
Step 3: Add High-Quality Organic Matter
This is the most critical step for restoring microbial life. Adding a 2 to 4-inch layer of well-decomposed organic matter is the best long-term solution for waterlogged soil. Good quality compost is the number one choice. It acts like a sponge, improving drainage in heavy soil, while also being a food source for surviving microbes and introducing a new, diverse population of beneficial bacteria and fungi. In India, vermicompost (worm castings) and well-rotted cow dung manure are excellent, widely available options. These amendments physically separate dense soil particles, creating the air and water channels necessary for a healthy root system to develop.
Step 4: Replenish with Microbial Inoculants
To give your soil a powerful boost, consider using microbial inoculants. Think of these as probiotics for your garden. These products contain concentrated populations of beneficial microbes, such as Trichoderma, Pseudomonas, and various nitrogen-fixing bacteria. They can be found at garden centres or online. You can also create a simple, homemade version called compost tea. This involves steeping a bag of good compost in a bucket of aerated water for 24 hours. The resulting liquid is a brew teeming with beneficial microorganisms that you can drench the soil with, helping to quickly repopulate the microbial community that was lost during the waterlogging.
Step 5: Mulch and Future-Proof Your Garden
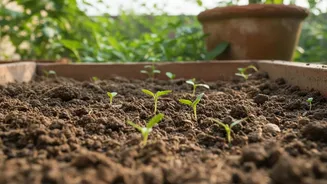
Once you have amended the soil, apply a layer of organic mulch, such as dried leaves or wood chips. However, do this with caution. If more heavy rain is expected, a thick layer of mulch can trap too much moisture. In drier conditions, mulch helps regulate soil temperature, suppress weeds, and slowly breaks down to continuously feed the soil. For future resilience, especially in low-lying plots, consider creating raised beds. Elevating the garden bed by even 6-8 inches can dramatically improve drainage and protect your plant roots from becoming waterlogged in the next heavy downpour.