


The Magic of Kitchen Alchemy
In every Indian household, the concept of 'waste not, want not' isn't just a saying; it’s a way of life. We are masters of reinvention, especially in the kitchen. That small portion of leftover morning rice, often overlooked, is the perfect example. Instead
of discarding it, you can perform a little kitchen alchemy and turn it into a jarful of crisp, delicious rice fryums, known variously as *sandige*, *vadam*, or *kurdai*. This isn't just about saving food; it's about reviving a cherished tradition of summer holidays, of terraces lined with sheets of drying papads, and the simple joy of a crunchy, homemade snack. This guide will walk you through the process, turning a humble leftover into a treasure.
What You Will Need
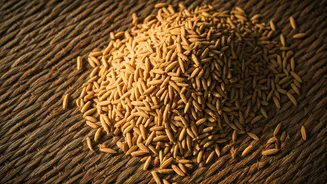
The beauty of this recipe lies in its simplicity. You don’t need fancy ingredients, just a little patience and a bit of sunshine. Here is your basic toolkit: * **Leftover Cooked Rice:** About 1 cup. Any plain, non-sticky variety like Sona Masoori or similar works best. Avoid basmati if possible, as its texture can be too separate. * **Water:** Approximately 2 cups, plus more for adjusting consistency. * **Salt:** To taste. * **Seasonings (Optional but Recommended):** 1 teaspoon of cumin seeds (*jeera*), 1 teaspoon of sesame seeds (*til*), and a pinch of asafoetida (*hing*). You can also add red chilli flakes or finely chopped green chillies for a spicy kick.
Step 1: Create a Smooth Paste
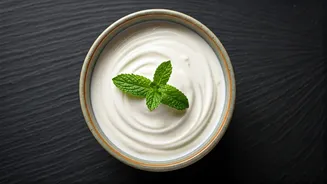
The foundation of a good fryum is a perfectly smooth batter. Take your leftover cooked rice and place it in a mixer-grinder. Add about half a cup of water to start. Grind the rice into a fine, smooth paste. You might need to stop and scrape down the sides a few times. The goal is a consistency similar to idli or dosa batter—completely smooth, with no grains of rice visible. If the mixture is too thick to grind properly, add a little more water, one tablespoon at a time. A smooth paste is non-negotiable, as any lumps will result in an uneven texture in the final fryum.
Step 2: Cook the Batter
Transfer the smooth rice paste to a heavy-bottomed pan or kadai. Add the remaining water (around 1.5 cups), salt, and your chosen seasonings like cumin, sesame seeds, and asafoetida. Whisk everything together until there are no lumps. Now, place the pan on low-to-medium heat. The next ten minutes are crucial. You must stir continuously to prevent the mixture from sticking to the bottom and forming lumps. As it cooks, the batter will start to thicken and become glossy and translucent. You'll know it's ready when it pulls away from the sides of the pan and has a thick, porridge-like consistency. It should be thick enough to hold its shape when dropped from a spoon.
Step 3: Shape and Dry Your Fryums
This is where the fun begins. Let the cooked batter cool down just enough so you can handle it. Prepare your drying surface: a large plastic sheet, a greased steel plate, or a tray lined with parchment paper. You have a few options for shaping: 1. **The Drop Method:** Simply take a spoonful of the batter and drop small dollops onto the sheet, leaving space between them. 2. **The Piping Method:** For more uniform shapes, fill the batter into a piping bag (or a sturdy plastic bag with a corner snipped off) and pipe out small circles, lines, or squiggles. Once shaped, the most important step is drying. The traditional method is to sun-dry them for 2-3 days, or until they are completely brittle and snap easily. If you live in an apartment or don't have access to direct sunlight, you can dry them indoors near a sunny window, which may take longer. Alternatively, use an oven on its lowest temperature setting with the door slightly ajar for a few hours.
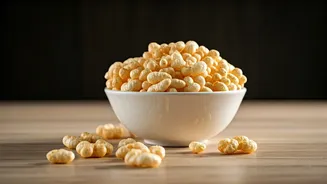
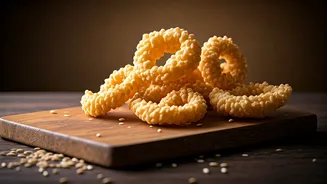
Step 4: The Crispy Payoff
Once your rice fryums are bone-dry, they are ready for their final transformation. You can store these dried discs in an airtight container for months, ready to be fried whenever you crave a snack. To fry, heat a neutral oil in a kadai over medium-high heat. The oil must be hot enough. You can test it by dropping in a small piece; it should sizzle and puff up immediately. Gently slide a handful of the dried fryums into the hot oil. In seconds, they will expand to double or triple their size and turn a beautiful, crisp white. Use a slotted spoon to remove them quickly before they brown, and place them on a paper towel to drain any excess oil. Serve them hot as an accompaniment to a meal of rice and dal, or simply as a standalone evening snack with your tea.