
Start with Ghee
The journey to a quick Gajar ka Halwa begins by preparing your foundational ingredients and starting the cooking process in a generous amount of ghee.
This crucial first step ensures the carrots are perfectly sautéed and develop their delicious flavor profile. Gently heat the ghee in a pan or kadhai over medium heat. Make certain the ghee is adequately melted and heated. If you have chosen to include other ingredients, ensure they are ready to go, for the next steps require focus and attention to detail. This preliminary step establishes the basis for an evenly cooked and flavorsome dessert. Pay close attention to the heating process to get your cooking journey started.
Add the Milk
Once your ghee is ready, the next step involves introducing the milk. Pour the milk into the pan with the sautéed carrots. Milk not only contributes moisture to the dish, but also imparts a creamy texture and helps soften the carrots. As you cook, it slowly reduces, thickening the halwa. Stir the mixture continuously, ensuring that it doesn't stick to the bottom of the pan and that the milk doesn't scorch. This consistent stirring also prevents the formation of lumps, resulting in a smooth and creamy texture. The milk should completely envelop the carrots. This ensures that the carrots cook evenly and absorb the flavors of the milk. This step is about integrating the ingredients and preparing them for the next stages of flavor development.
Sweeten It Up!
After adding milk and cooking the carrots, the next key element is adding the sweetener, traditionally sugar. The quantity of sugar can be adjusted based on personal preference. Begin by gradually adding the sugar to the pan, and stirring it in. This prevents clumping and aids in dissolving the sugar completely. As the sugar dissolves, it merges with the carrots and milk. This creates a syrupy consistency, contributing to the halwa's overall sweetness. This step is not just about sweetness; it is about bringing all the flavors together. The addition of sugar not only enhances the taste but also aids in the caramelization process, which lends a rich color and depth of flavor to the Gajar ka Halwa, making it irresistible.
Flavor and Garnish
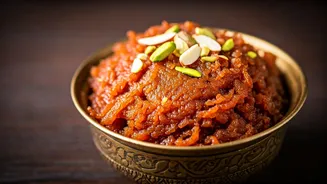
As the halwa nears completion, the process shifts towards the crucial step of flavoring and garnishing. This phase involves introducing spices and nuts. This helps enhance the taste and add a visually appealing element. Begin by adding cardamom powder or other desired spices to the cooking halwa. Spices introduce unique aromatic and taste components to the dessert. Now is also the time to add nuts. Nuts, like almonds and cashews, which can be toasted for enhancing the flavor, add a crunchy texture and richness to the dish. Once these components are in, mix everything thoroughly to distribute all flavors and textures evenly throughout the dish. This stage of flavor customization is what takes the dish to the next level of taste.
Serve It Hot
The final stage involves serving your Gajar ka Halwa. Once it has reached the ideal consistency and flavor, remove it from the heat. Allow it to cool down slightly. The most enjoyable way to relish the Gajar ka Halwa is by serving it warm. Serving it warm brings out the aroma, allowing you to fully experience the flavors. Garnish it with extra nuts or a sprinkle of cardamom, if desired, to improve the presentation. Presenting it beautifully elevates the entire dining experience. Enjoying it warm enhances the texture and allows you to enjoy the full range of flavors. Serve immediately and savor the result of your quick and easy 10-minute Gajar ka Halwa.