Discover 7 Steps to Achieve Perfect Beachy Waves at Home! Effortless, Chic Look Awaits! Read on for Hair Tips & Tricks
Who doesn't love the breezy, carefree look of beachy waves? It’s the hairstyle that
screams effortless chic, perfect for a day out, a casual brunch, or even a special occasion. But heading to the salon every time you crave those textured tresses can be quite the pocket pinch. Well, fret not, ladies!
Achieving salon-worthy beach waves at home is totally doable, and we're here to break down the process into seven easy-peasy steps. So, ditch the pricey salon visits and get ready to rock those gorgeous waves without breaking a sweat (or the bank!).
Clean, textured hair holds waves best; prep with product and avoid freshly washed hair
The foundation for fab waves is clean and slightly textured hair. Avoid freshly washed, super-slippery hair, as it won't hold the waves well. If your hair is squeaky clean, consider using a texturizing spray or dry shampoo at the roots to add some grip.
Ideally, aim for hair that's washed the day before, or even two days prior, allowing your natural oils to contribute to the wave's hold. Remember, product is key! A little goes a long way in achieving that perfect balance between tousled and weighed down.
Starting with hair that has a bit of grit helps the waves form and last longer throughout the day. Think of it like prepping a canvas before painting – the right base makes all the difference! And before you begin, don't forget to brush your hair to remove any tangles or knots.
Smooth hair ensures even wave distribution and prevents any unwanted frizz or unevenness in your final look. After that you are good to go ahead with the remaining procedures.
Choose the right curling tool for your desired wave pattern
Now, for the main event – selecting your curling tool! There are several options available, each offering a slightly different wave pattern. A curling wand (without a clamp) creates more natural-looking, looser waves.
A traditional curling iron with a clamp can produce tighter, more defined curls that can then be tousled into beach waves. You can use a flat iron. The trick is to twist and glide the flat iron down the hair shaft, creating a bend rather than a tight curl.
The choice is yours, based on your preference and what you already have at home. Consider the barrel size of your curling iron or wand. A larger barrel (around 1-1.5 inches) is ideal for achieving loose, beachy waves, while a smaller barrel will create tighter curls.
If you're using a flat iron, the width of the plates doesn't matter too much – it's all about the technique. Experiment to find what works best for your hair type and the kind of waves you're aiming for. Also, consider the heat setting. It's crucial to protect your hair from heat damage!
Always use hair heat protectant spray.
Use heat protectant before styling for healthy, shiny hair
Before you even think about turning on your curling iron or wand, this step is non-negotiable! Heat protectant is your hair's best friend, shielding it from the damaging effects of heat styling.
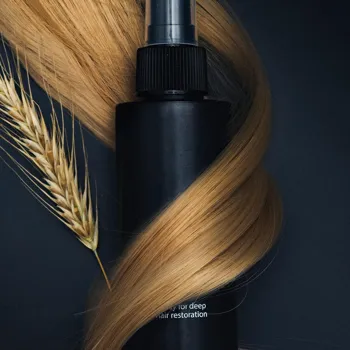
Spray a generous amount of heat protectant evenly throughout your hair, focusing on the mid-lengths and ends, which are most susceptible to damage.
Not only does heat protectant prevent breakage and dryness, but it also helps to smooth the hair cuticle, leaving your waves looking shinier and healthier. Think of it as sunscreen for your hair – it's an essential step in any heat styling routine!
Choose a heat protectant that's specifically designed for your hair type. There are lightweight formulas for fine hair that won't weigh it down, and moisturizing options for dry or damaged hair. Read the label carefully and select a product that suits your needs.
Don't skip this step if you prioritize the longeritivity and health of tour hair. It ensures that the waves you create now, will continue to look healthy and beautiful for days to come.
Achieve beachy waves by waving hair, not tightly curling it
This is where the magic happens! The key to achieving beachy waves is to "wave" the hair, not curl it tightly. This means avoiding a uniform, perfect curl and opting for a more relaxed, undone look.
Start by sectioning your hair into manageable sections (usually 2-3 sections, depending on the thickness of your hair). Take a 1-2 inch section of hair and wrap it loosely around the barrel of your curling wand or iron, leaving about an inch or two of the ends out.
Hold for a few seconds, then release. For a more natural look, alternate the direction of the waves – curl some sections away from your face and others towards your face. This creates a more tousled, effortless effect.
If you're using a flat iron, clamp the iron near the roots of a section of hair, twist it away from your face, and glide it down the hair shaft, releasing the twist as you go. Practice makes perfect, so don't be discouraged if you don't get it right away.
Create effortless waves without a brush for a natural, beachy look
Once you've waved all sections of your hair, resist the urge to run a brush through it! Instead, gently shake out the waves with your fingers to break them up and create a more natural, tousled look.

You can also flip your head upside down and shake your hair from the roots to add volume and separation. This step is crucial for achieving that effortlessly chic, undone vibe. Don't be afraid to get a little messy!
The goal is to create waves that look like you've spent a day at the beach, not like you've just stepped out of a salon. If you find that some waves are too defined, gently pull on the ends to loosen them up.
The key is to experiment and find what works best for your hair type and the look you're going for.
Enhance waves with texturizing spray for natural, beachy look
Now that you've got your waves, it's time to add some product to enhance the texture and hold. A texturizing spray or sea salt spray is perfect for adding grit and definition to the waves, creating that beachy, windswept look.
Hold the can about 6-8 inches away from your hair and spray evenly throughout, focusing on the mid-lengths and ends. If you want to add more volume at the roots, you can use a volumizing spray or root lifter.
For extra hold, finish with a light-hold hairspray to keep your waves in place all day long. Be careful not to overdo it with the product, as this can weigh down your hair and make it look greasy. Start with a small amount and add more as needed.
The goal is to enhance your natural texture, not to create a stiff, artificial look.
Personalize beachy waves with unique touches for your style and vibe
Now that you've mastered the basic technique, it's time to personalize your beachy waves and make them your own! Experiment with different partings, hair accessories, or even a half-updo to create a look that's uniquely you.
Try a deep side part for a more dramatic effect, or add a few braids for a bohemian vibe. A cute headscarf or a few strategically placed bobby pins can also elevate your beachy waves and add a touch of personality. Don't be afraid to get creative and have fun with it!
The beauty of beachy waves is that they're so versatile and can be adapted to suit any style or occasion. With a little practice and experimentation, you'll be rocking those gorgeous waves in no time! So go ahead, embrace your inner beach babe and unleash those effortless, chic vibes.
AI Generated Content. Glance/InMobi shall have no liability for the content





![[WATCH] T20 World Cup 2026: Gautam Gambhir hosts dinner for Team India players ahead of Namibia clash](https://g-mob.glance-cdn.com/public/fc/image/7gXS1xdhs5Q0.webp)


